 Published by Sascha Neumeier
Last updated on January 23, 2024
•
8 minute read
👉 Part 1/2 Monitoring your AWS environment with PRTG
Part 2 | Hands-on guide on how to setup your AWS monitoring in PRTG
Nice to have you here again, this time for part 2 of our article series AWS Monitoring with Paessler PRTG. In part 1 I gave you a detailed overview of all AWS sensor types available in Paessler PRTG. With this set of sensors, you can monitor almost any common use case in Amazon Web Services easily.
In this article, you'll get hands-on experience. You will learn how to use the AWS sensor types in PRTG, where to include them, and what to configure to make everything work.
To help you follow along, I'll include screenshots whenever possible.
If you are not yet familiar with our current AWS sensor types in PRTG, I recommend you take a brief look at the first part of the series: Monitoring your AWS environment with PRTG - Part 1/2
Otherwise, let's not waste any time; let's get started!
1. Preparation
You will need the following items to get through this hands-on guide safely and end up with a working AWS monitoring system:
- An instance of PRTG Network Monitor, PRTG Hosted Monitor or PRTG Enterprise Monitor including credentials with editing rights.
- Credentials for your AWS account to make changes (set up a user, create access key, etc.)
- If you have already prepared your AWS environment for monitoring with PRTG, make sure you have your AWS Access Key and Secret Key at hand.
- Please also grab a beverage of your choice ☕ and make sure you have about 20-30 minutes of distraction-free time.
OK, everything prepared? Then log into PRTG and we'll start with the configuration. This is going to be fun! 🤩
2. Create a device group
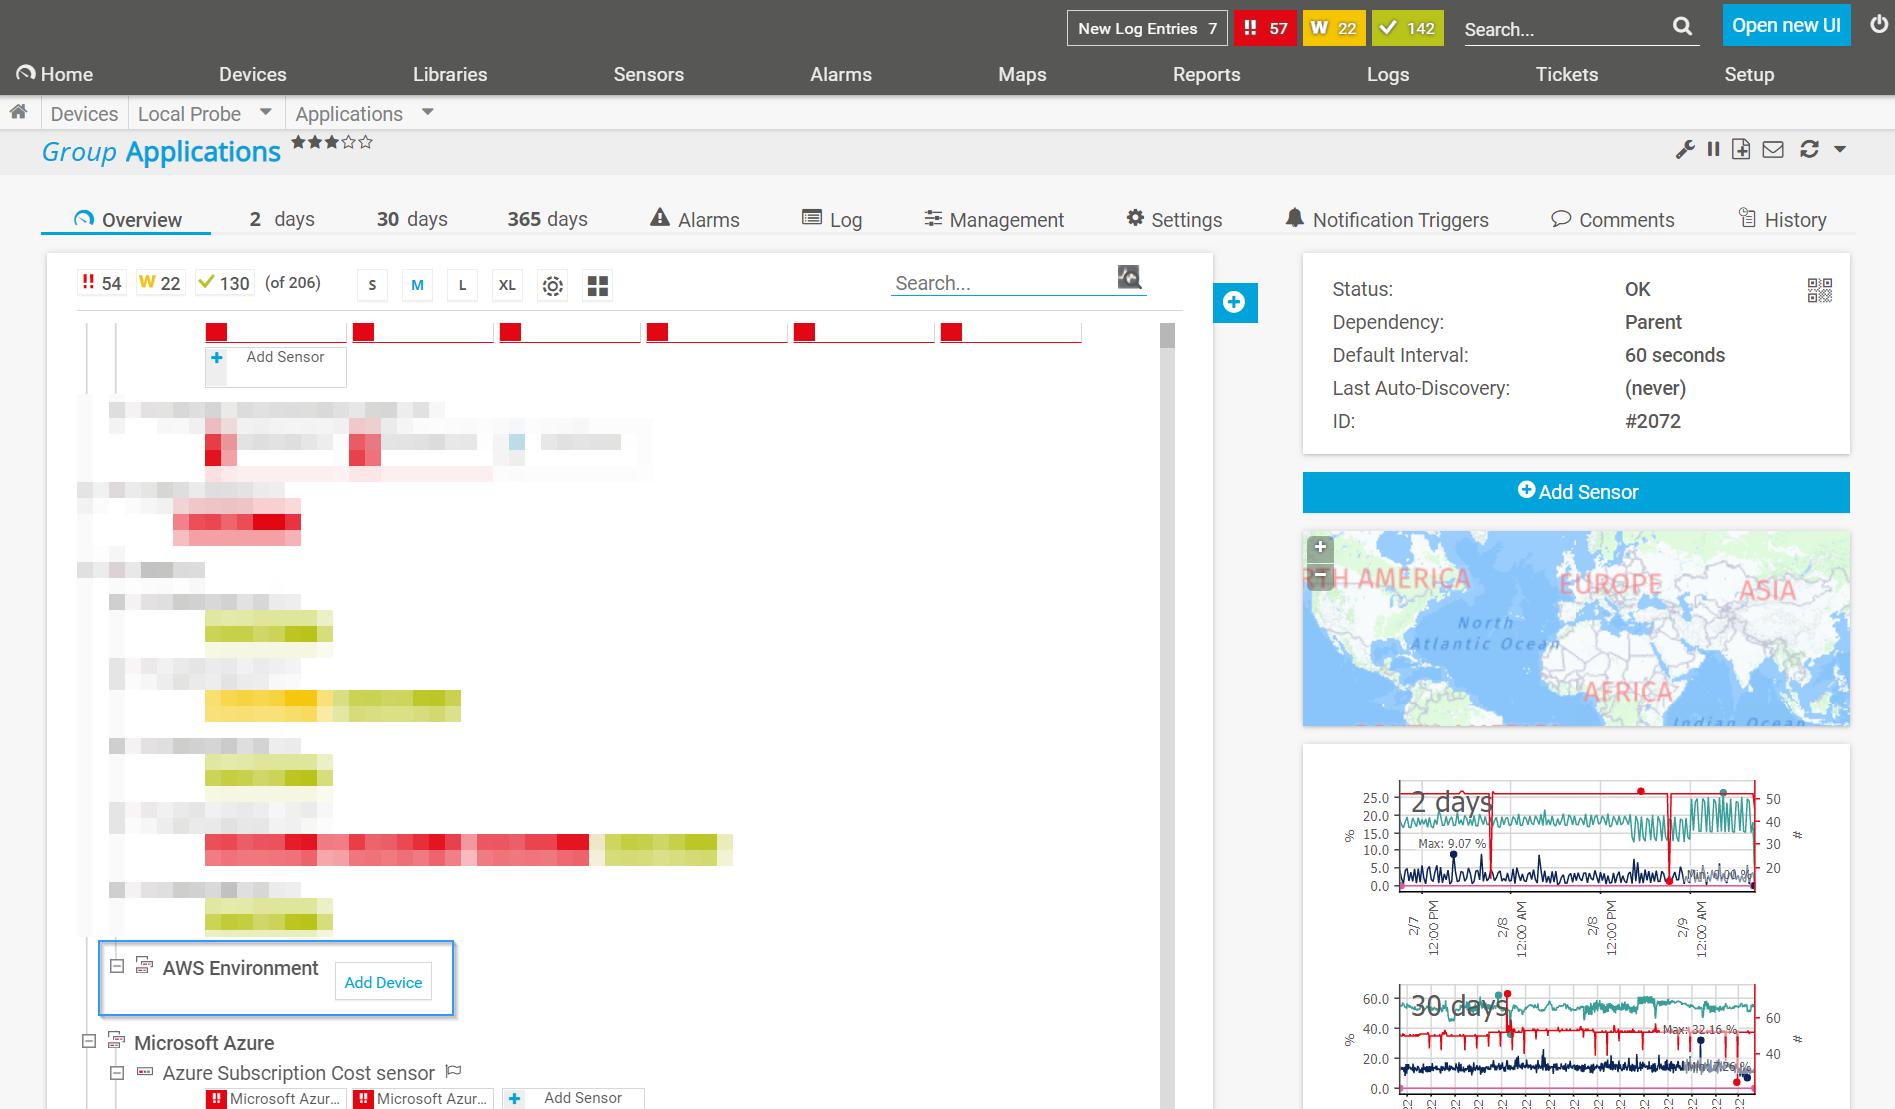
I always recommend that you set up a device group. This is not mandatory, but it makes it much easier for you to store your credentials there so they can be inherited by devices below in your PRTG device tree. You can also define special settings within the device group, which then only explicitly affect your AWS sensors.
This is what it might look like:
3. Set AWS permissions for PRTG
All our AWS sensors in PRTG query data from the AWS API. To make this work, PRTG needs permissions in your AWS environment. Find all necessary configuration steps in our knowledge base article How do I set permissions for the Amazon Web Services (AWS) API key to use certain sensors in PRTG?.
Work through that guide step by step, and at the end you will have an access key and a secret key in your hands.
💎 In case you have set up access for PRTG in AWS before, you should already have the keys at hand. Then you don't need to configure anything else in AWS.
Now you can store the access key and the secret key in the settings of the device group. Insert the data and click "Save" to store the keys.

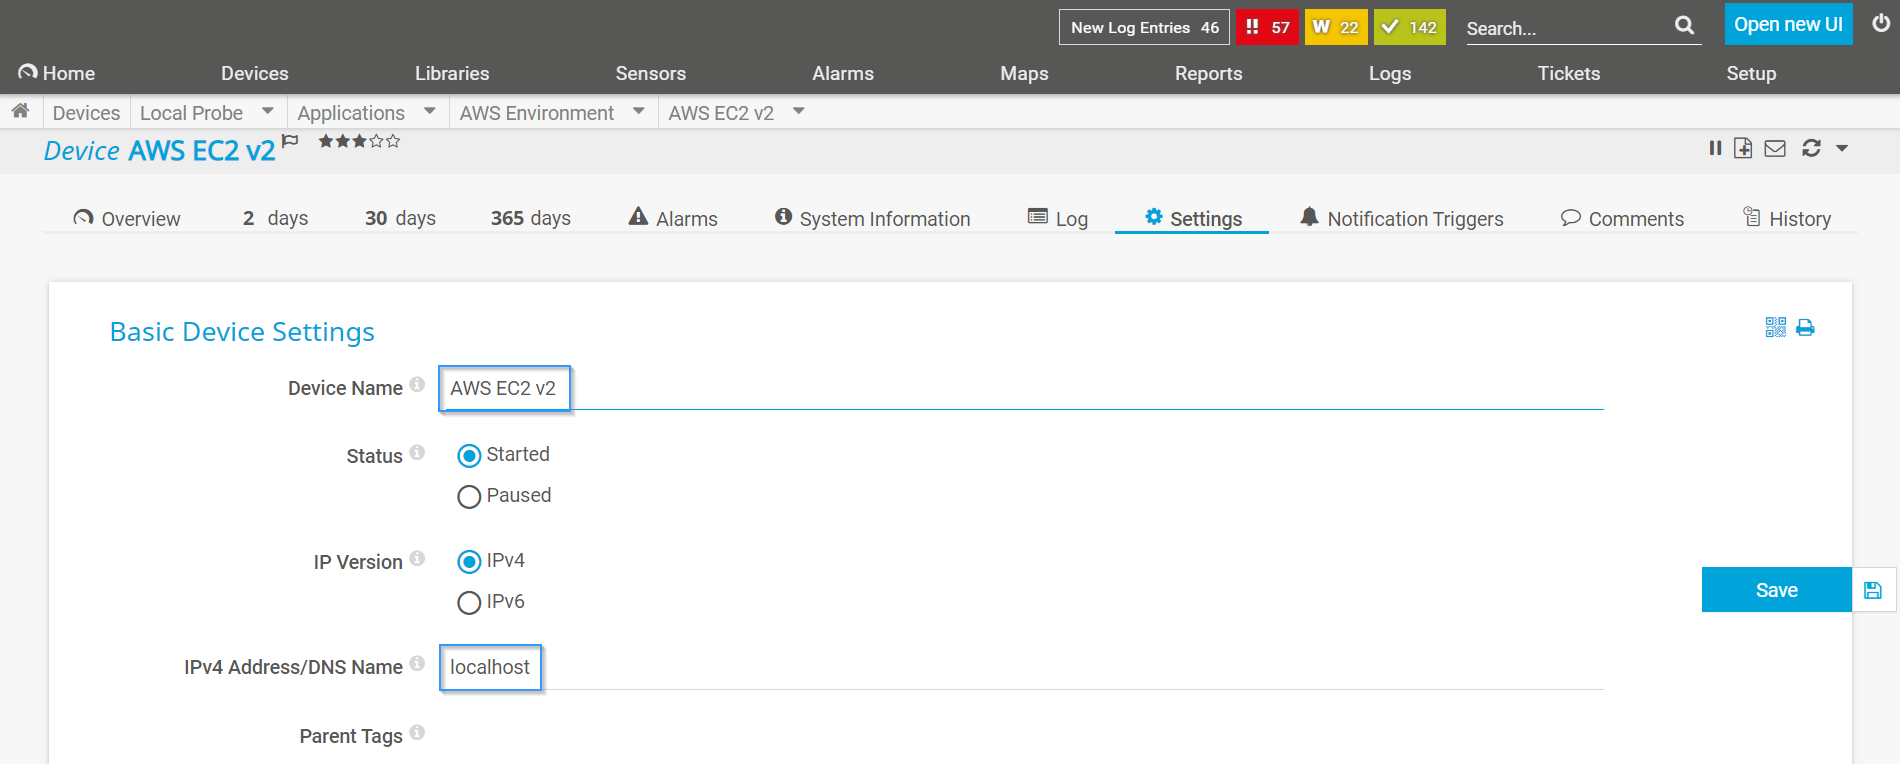
4. Create a device in PRTG
The next step is to add a device in PRTG. I usually do this by creating devices below my "AWS Environment" device group with the name of the service I intend to monitor. If I want to monitor the Amazon Elastic Compute Cloud service, my device in this case is called AWS EC2.
For the sake of clarity, I create a separate device for each service.
As DNS name, you can simply use localhost.
5. Add the AWS sensors you need
Now you're ready to go. You can now add all the sensors you need to monitor your desired AWS services. As a reminder, the following AWS sensor types are currently available in PRTG:
- AWS Alarm v2
- AWS Cost
- AWS EBS v2 (Elastic Block Store)
- AWS EC2 v2 (Elastic Compute Cloud)
- AWS ELB v2 (Elastic Load Balancing)
- AWS RDS v2 (Relational Database Service)
At this point in time, one or more of the AWS sensors are still in a Beta state. Since PRTG version 21.1.65, you can enable the Experimental Features setting “Beta Sensors”. This makes it possible for you to try out upcoming features fresh from our labs and to provide us early feedback. To learn more about our Experimental Features setting, check out our article New handling of beta sensors in PRTG Network Monitor.
To add sensors, click the "Add Sensor" button. After searching for 'aws v2', the screenshot shows the search result.
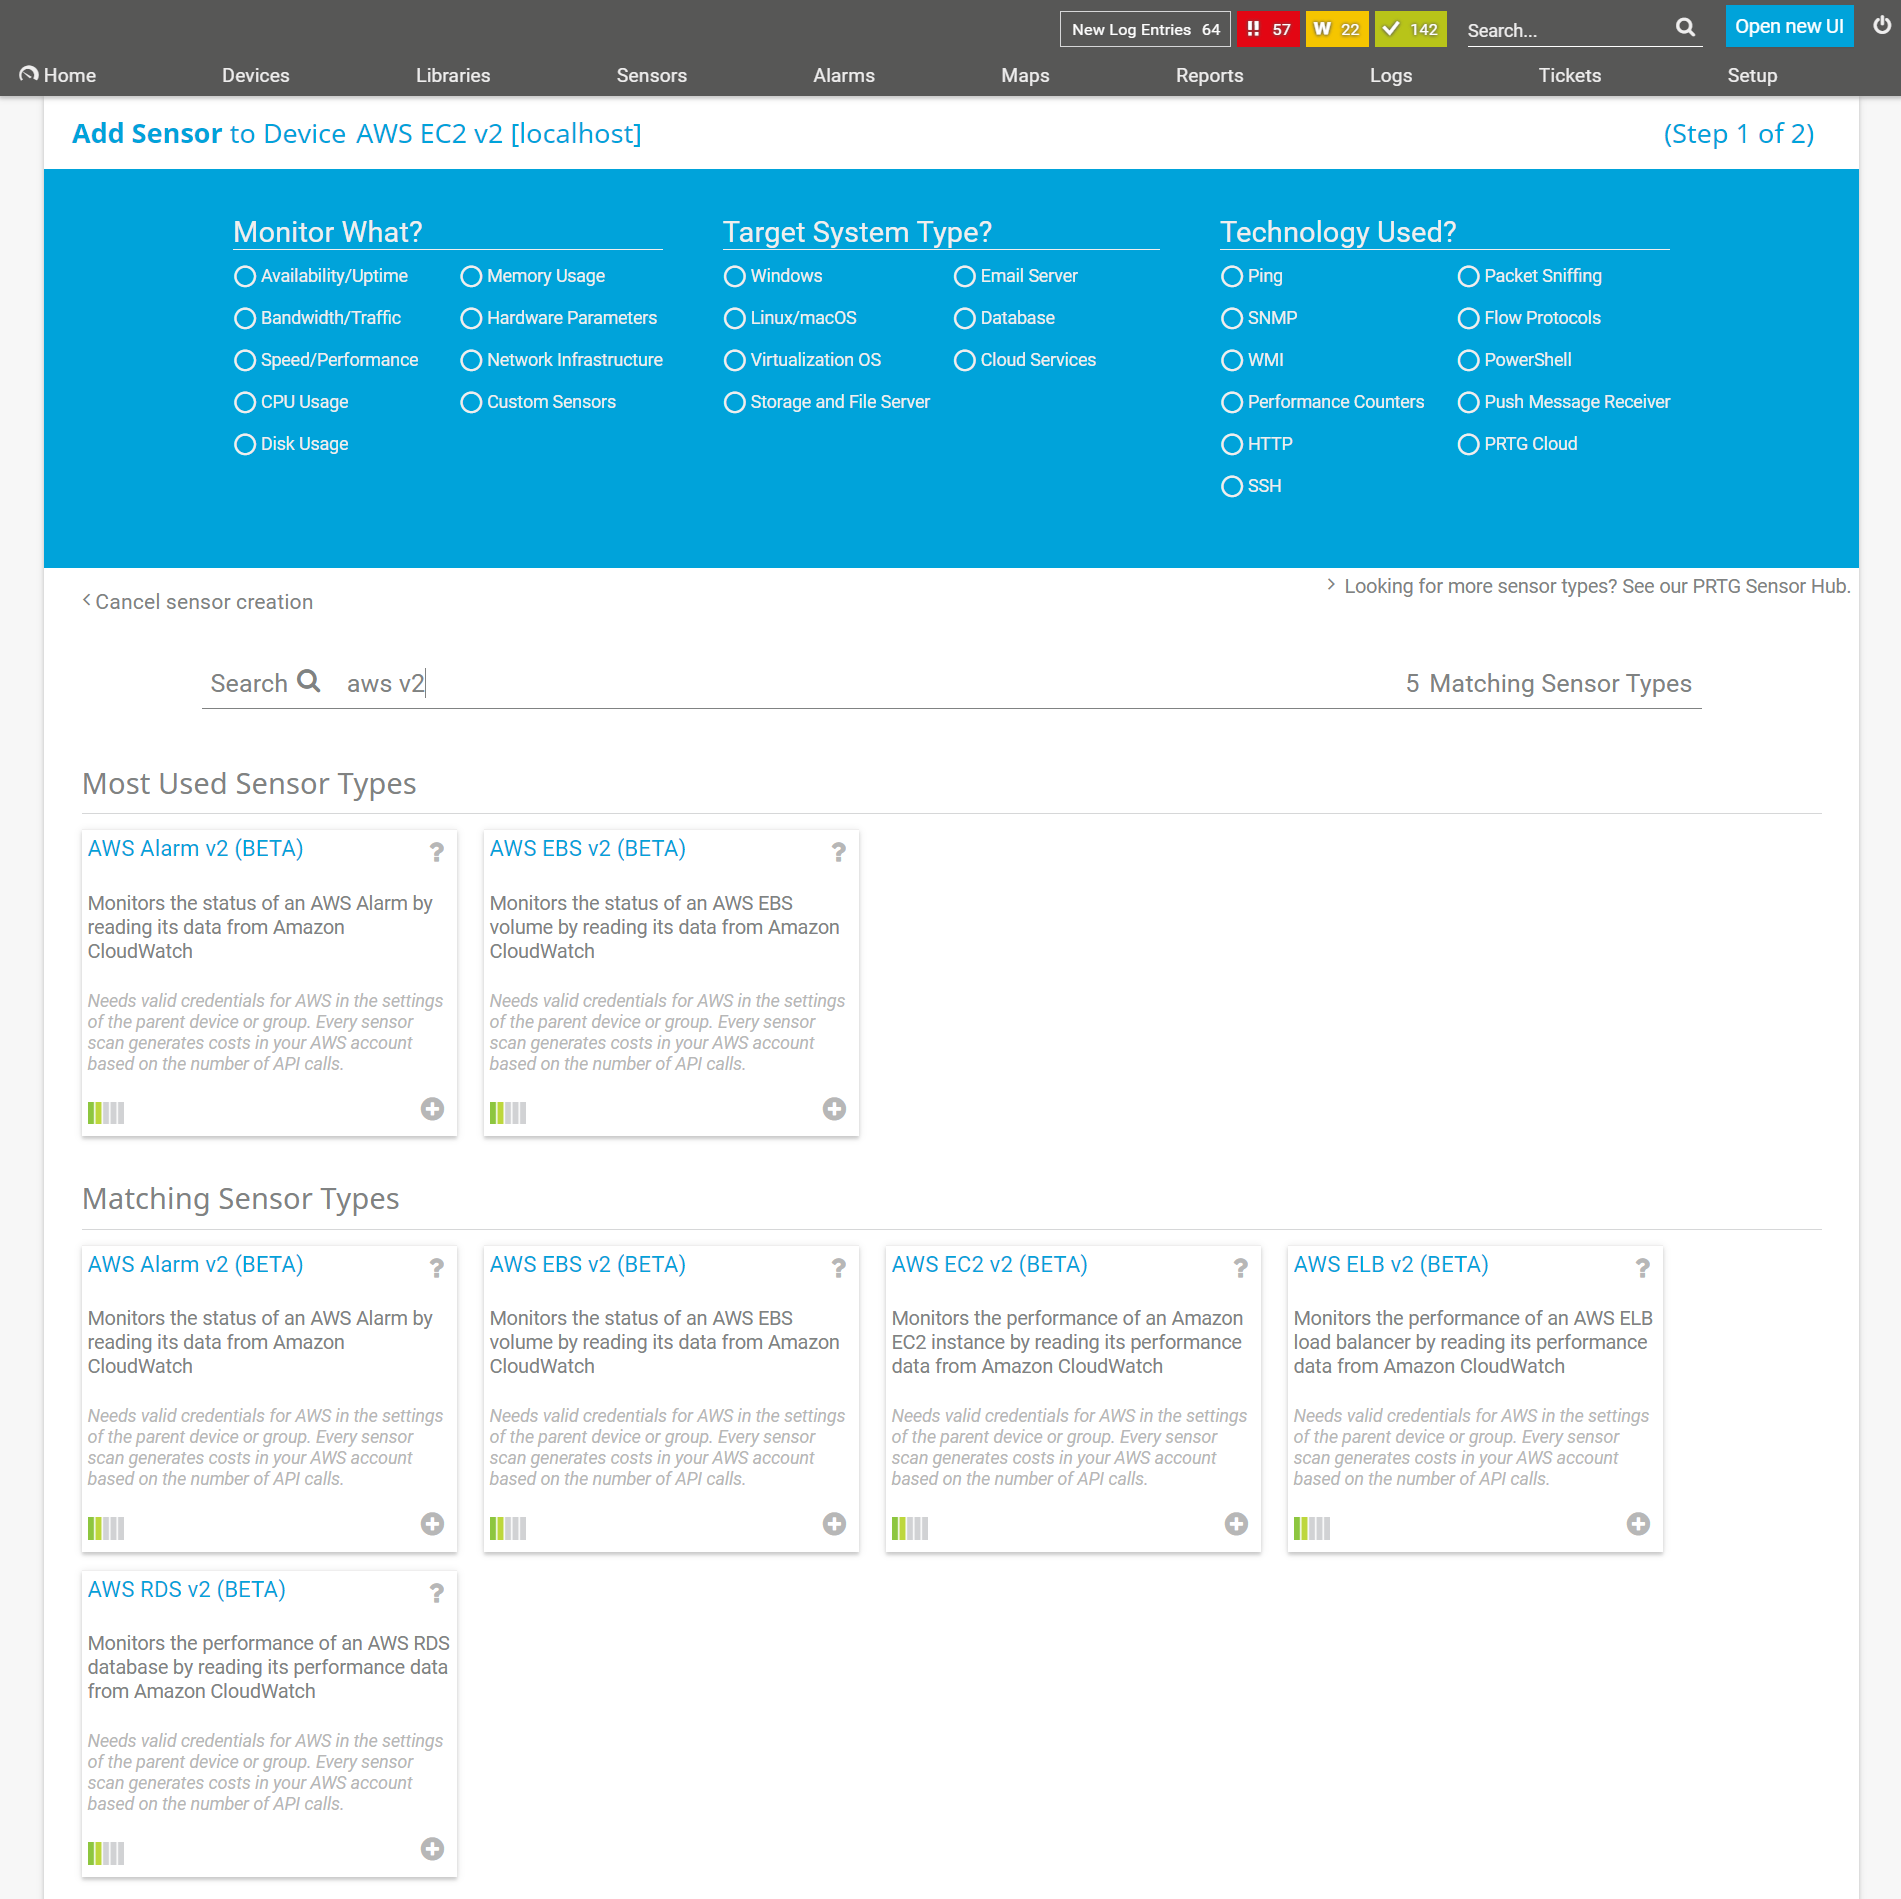
I'll just stick with my example and add an AWS EC2 v2 sensor.
💎 If you get an error or PRTG does not start to prepare the sensor settings, you probably did not set the access key or secret key correctly. In this case, just have a look at the paragraph Set AWS permissions for PRTG in this hands-on guide.
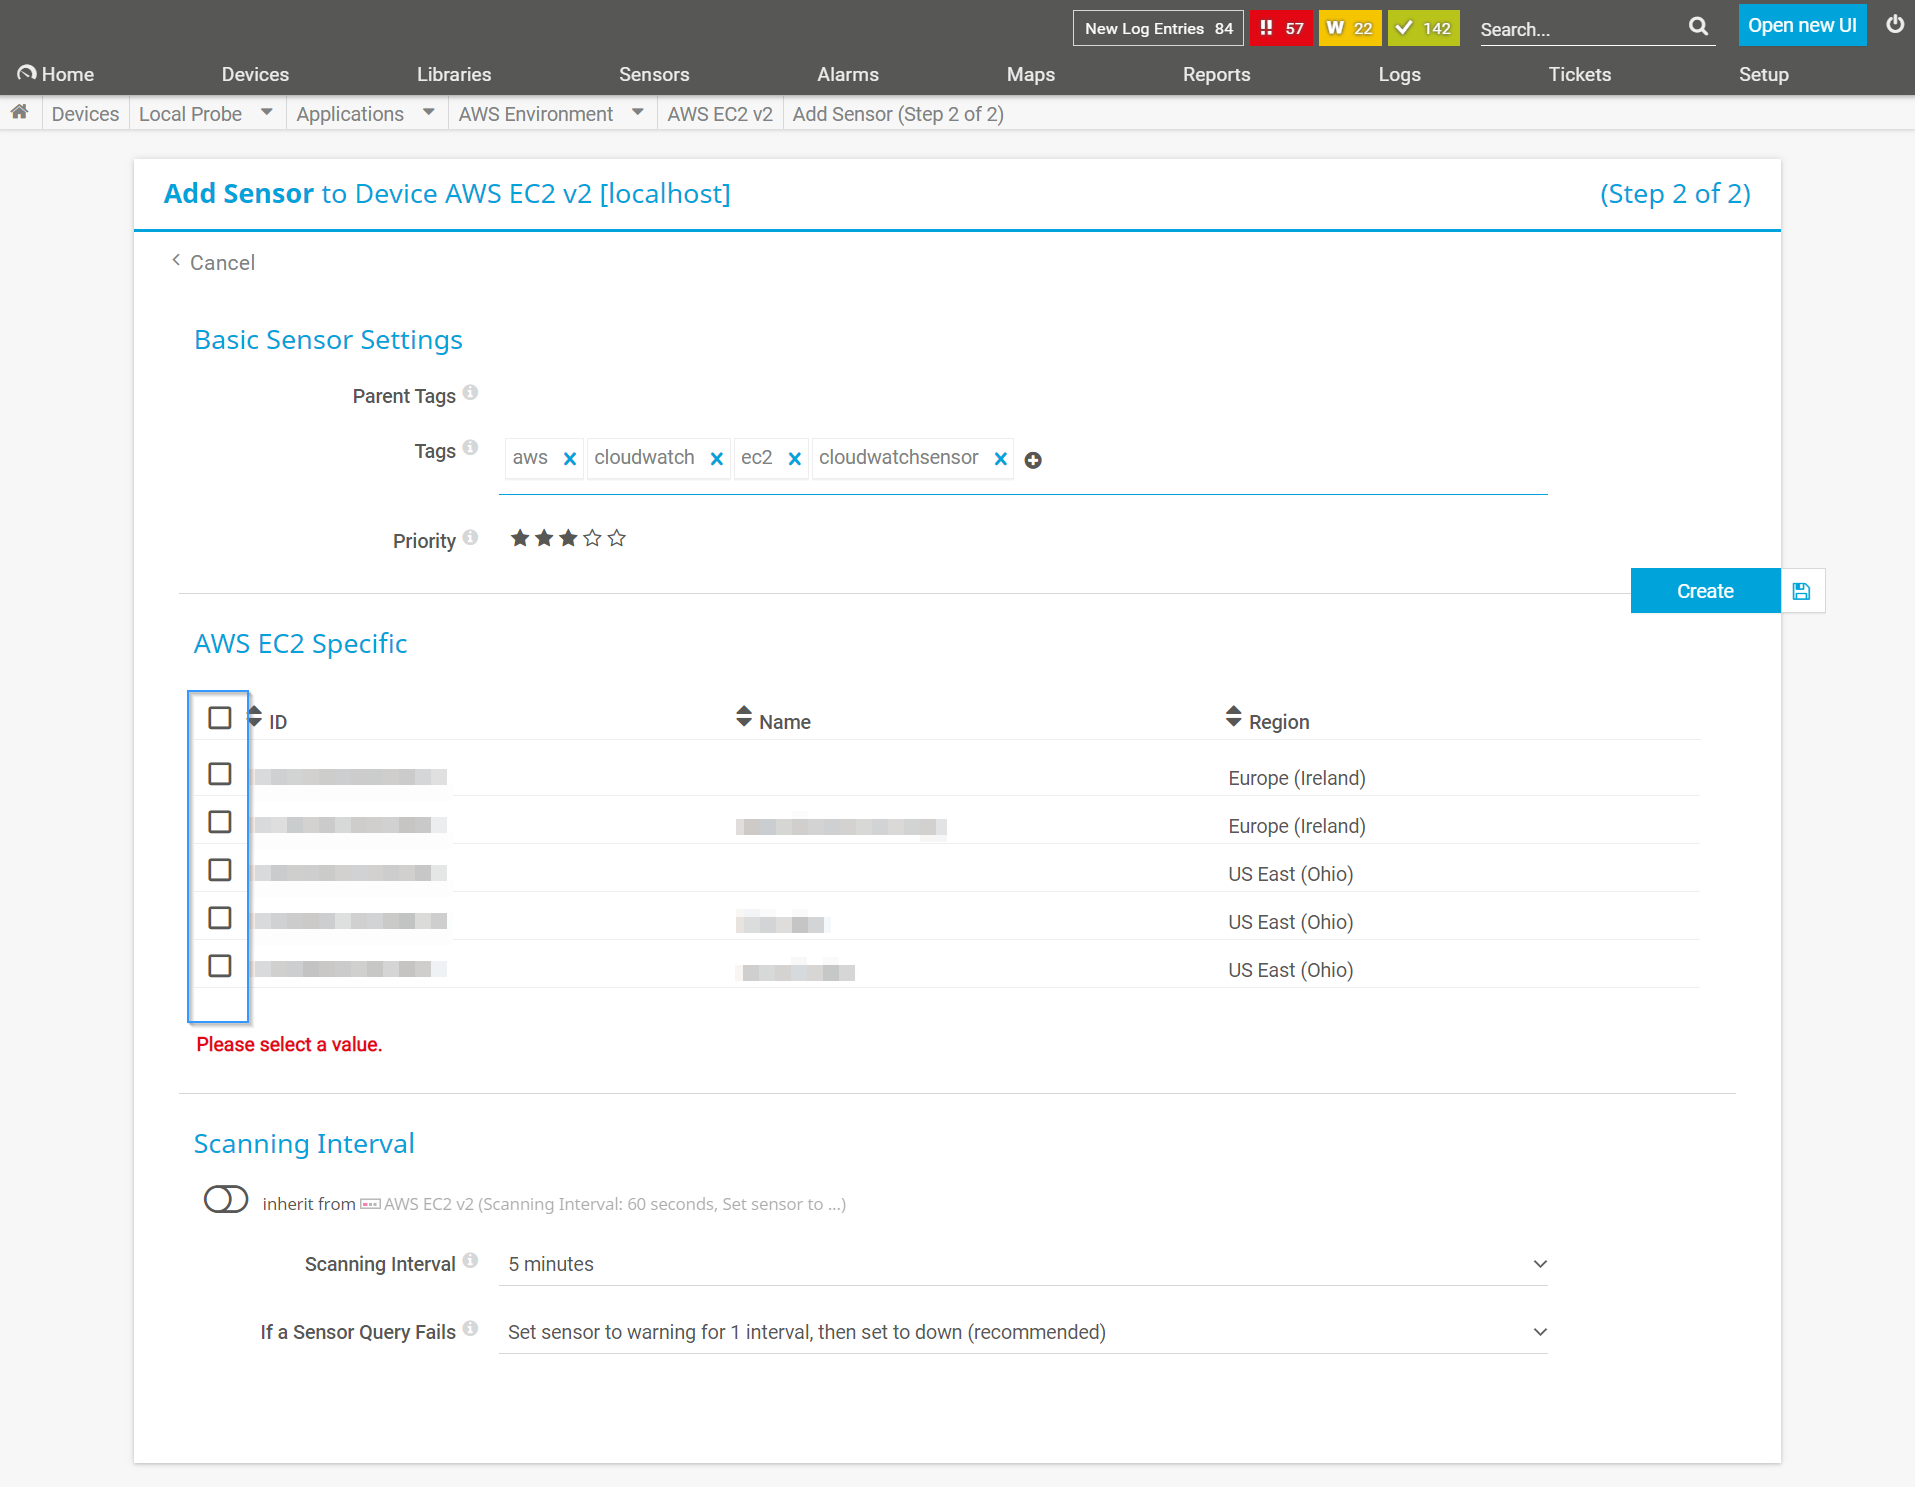
If the stored credentials are correct, you are asked to select the instance IDs you want to monitor as seen in the screenshot below. Confirm your selection with the Create button.
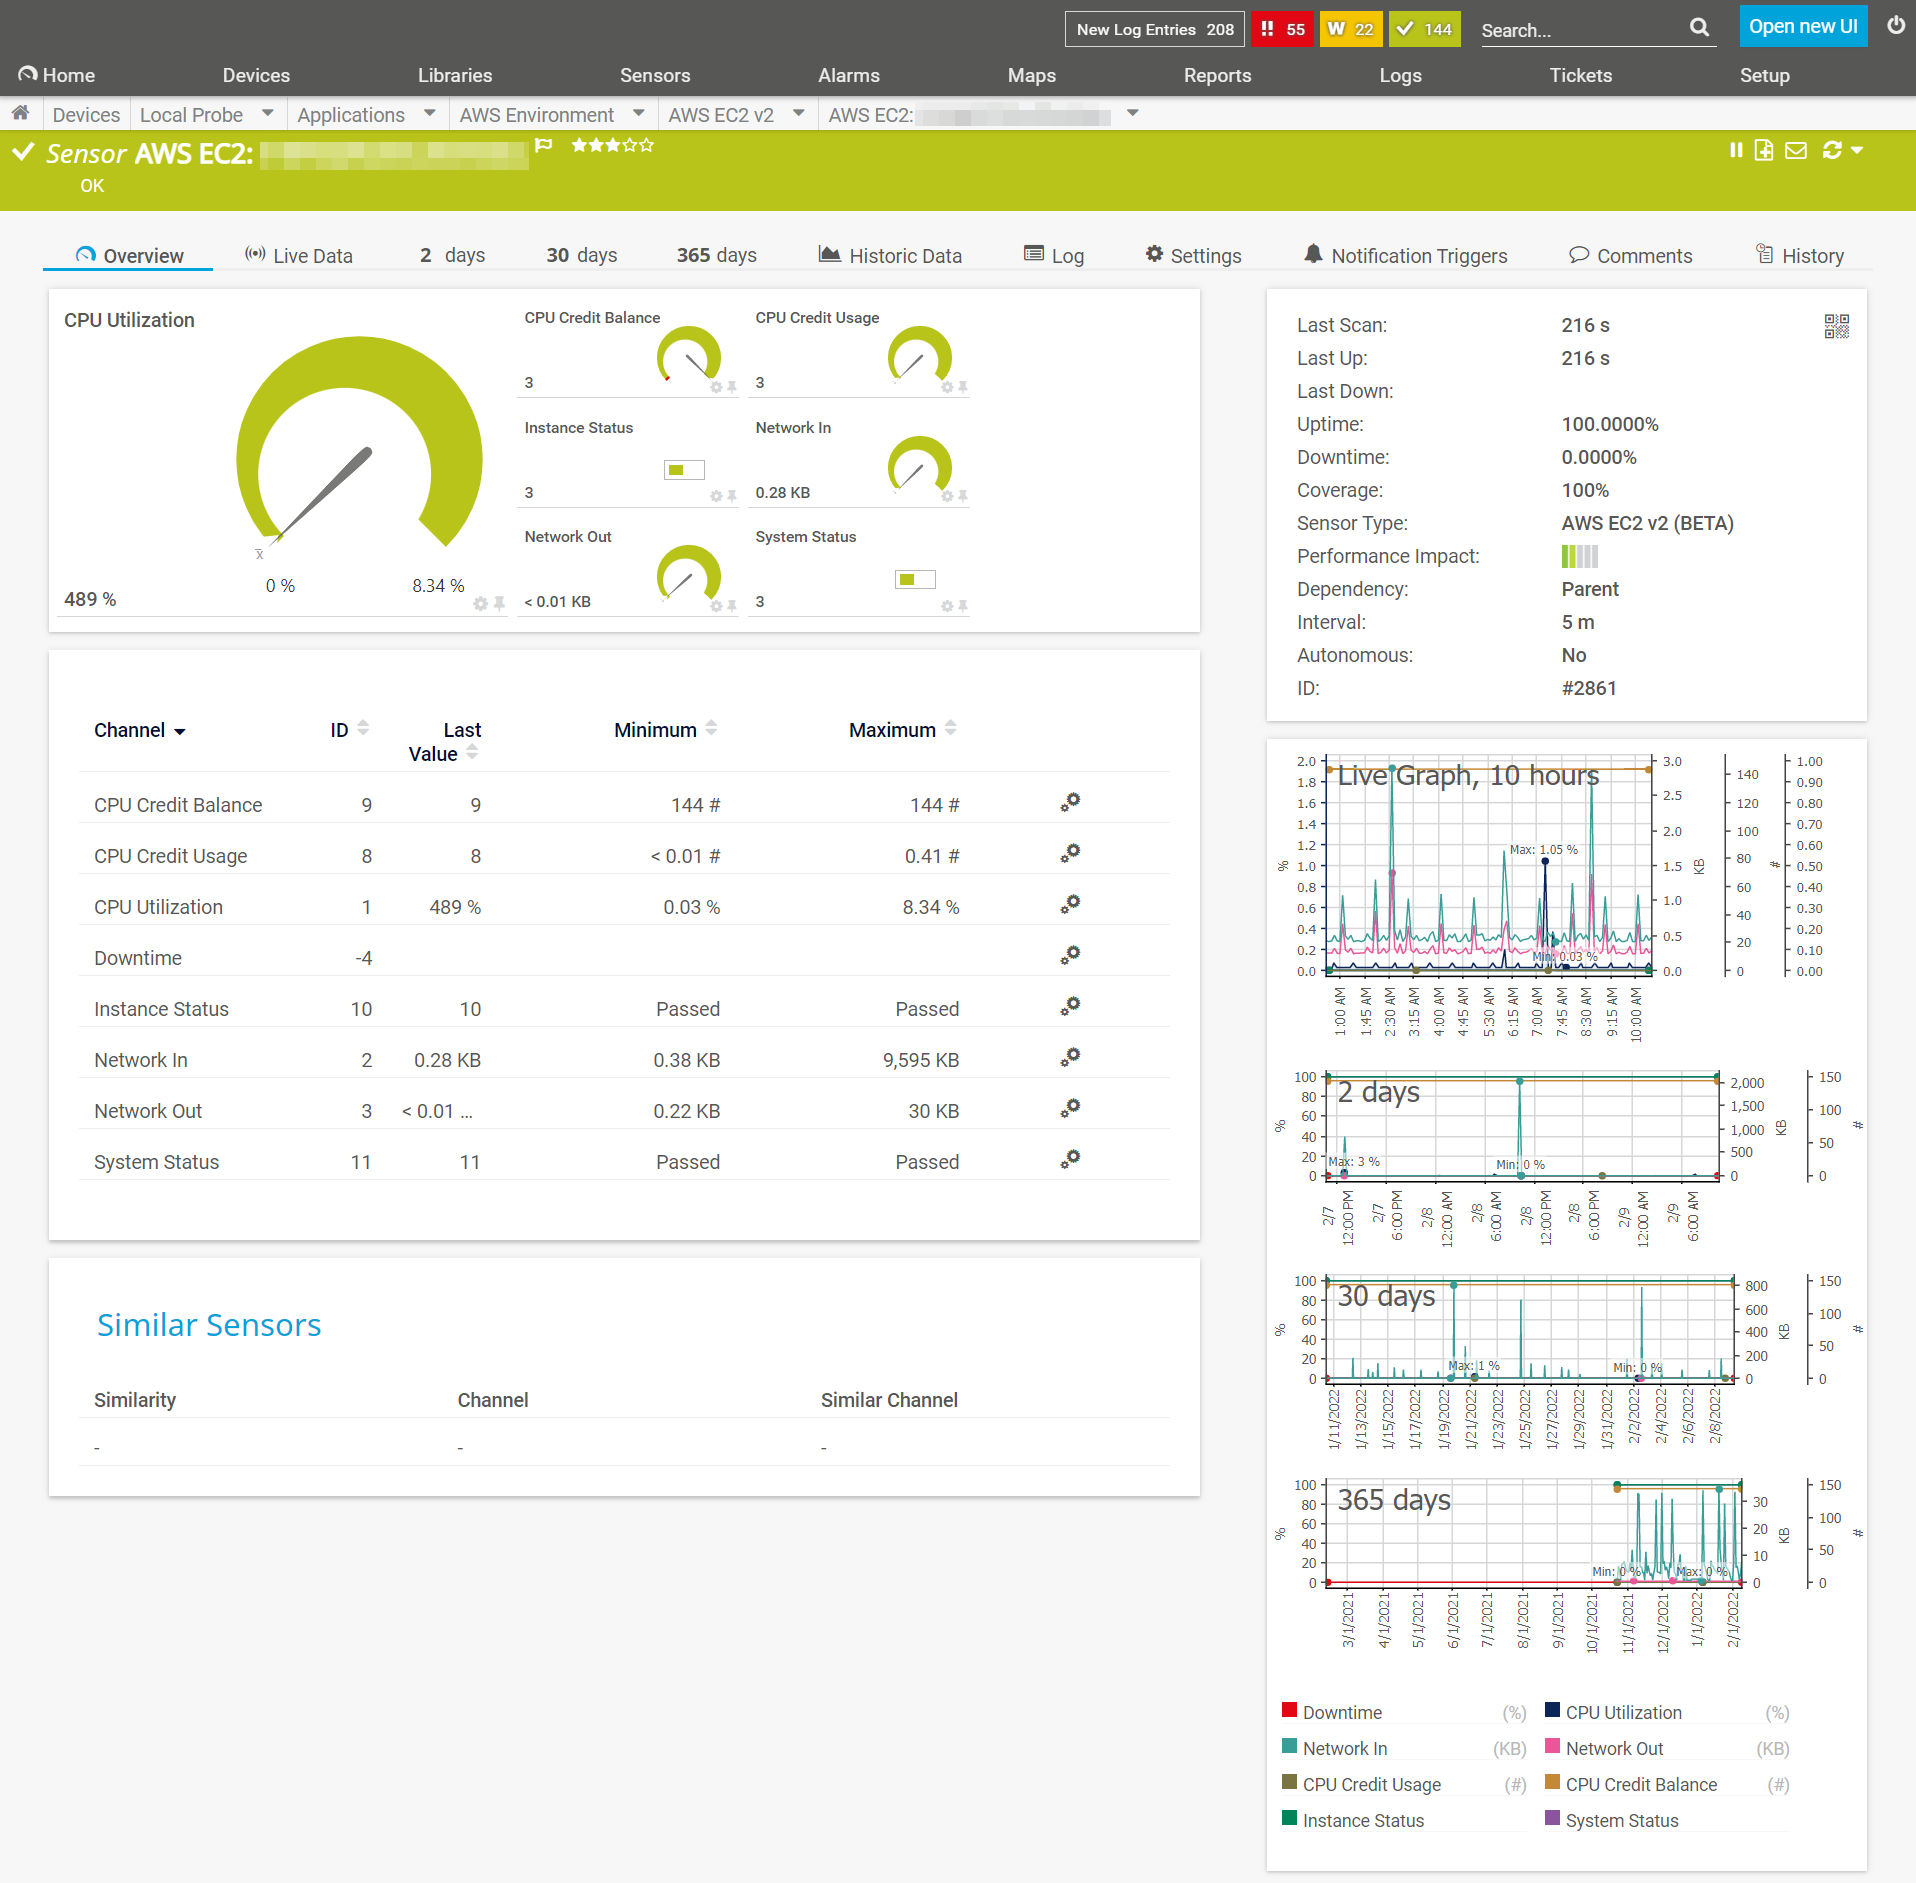
That's it, you're all set! The sensor starts collecting data now, and you can see detailed statistics. In our example with the AWS EC2 sensor, it looks like this:
You can now repeat the sensor setup for any other AWS services you would like to monitor.
If you have any questions or need assistance, our support team is happy to help ❤️. The best way to do this is to use the Contact Support button in the software. We also have a lot of other helpful support resources, just have a look here:

Fancy a try right away?
If you're already using PRTG, you're probably already trying it out, or you've been following along with my various steps.
If you don't use PRTG yet, I have good news for you: You can start right now with a free trial version with full functionality. You can choose whether you want to install PRTG on your server or directly use our cloud-based hosted version.
🔥 Paessler PRTG Network Monitor: More details + free download
☁️ Paessler PRTG Hosted Monitor (the cloud one): More details + start free trial
Want more tutorials like this?
I haven't shared much hands-on content with you lately. Would you like to see guides like this more often? If you enjoyed it, leave a comment below.
Feel free to also add what topic you'd like to read more about. You wish, I write! 😄