 Published by Michael Becker
Last updated on April 20, 2022
•
7 minute read
Welcome again to the third and last part of this blog series about 15 things in Paessler PRTG that can make your everyday use of PRTG easier. Have a look at the previous two articles in case you missed them. It's worth it! 😉
👉 15 things that make it easier for you to use PRTG (Part 1) (Part 2)
In this last part I will show you 5 more features and functions you should know about PRTG to use it in the best possible way:
- Comments at any level
- Map rotation
- Recommended sensors
- Notifications of sensors
- Navigation in menu bar
And here they are in detail!
11. Add comments at any level of the device tree
PRTG offers the option to add a comment for each object. No matter if it is a group, a device or a sensor. This feature can be especially helpful in large teams, for example, when you create a sensor and want to share more information about it with your colleagues. You can also use this function for documentation purposes.
For more information about object settings, have look here:
👉 PRTG Manual: Object Settings
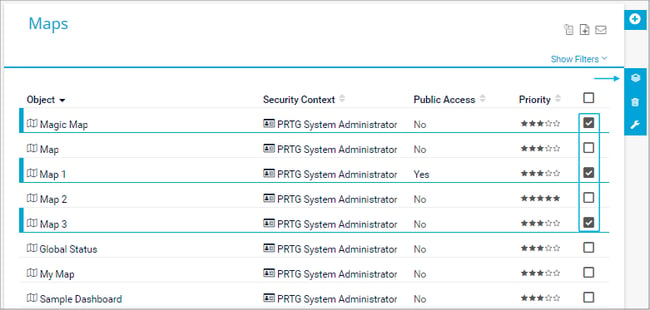
12. Let your maps rotate
Another great feature in PRTG is the Map Designer, which allows you to create dashboards according to your needs and with the information you'd like to see. Therefore, your imagination has no bounds. But what should you do if you've created several maps and want to display them all on one screen in a readable way? That's what map rotation is for!
Select the maps you want to rotate in the maps designer and click the "Map Rotation" icon:
PRTG now rotates the selected maps on a new page in a specific interval. To change the interval, hover the mouse over the refresh icon at the bottom right and change it to your preference. Alternatively, you can add the parameter "&interval=XX" in the URL, where XX is the value in seconds after the next map is displayed.
Example: https://my_prtg/mapshow.htm?ids=12345,12346,12347&interval=90
You can find further details about maps here:
👉 PRTG Video Tutorial: How to setup a map
13. Recommended sensors
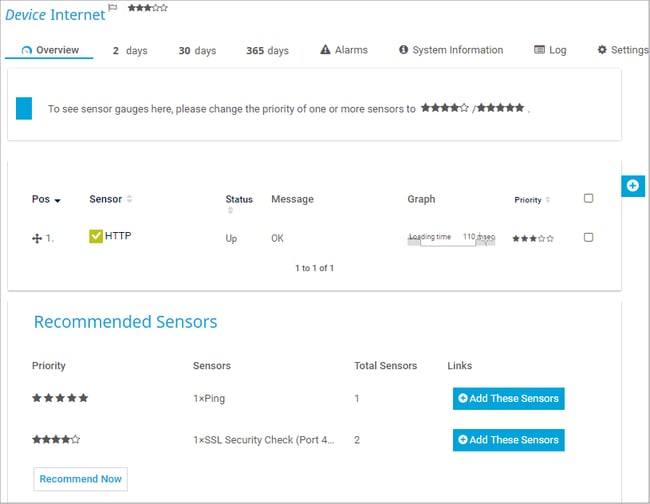
With the Recommended Sensors Detection feature, PRTG can explore any device and check which sensors you have already created. If it finds useful sensors that you have not created yet, you see a list of recommended sensors for your device.
 You can also manually start the recommended sensors detection on any device, by following these steps:
- Open the Overview tab of the device that you want to analyze.
- Start the analysis of the device by clicking Recommend Now or right-click the device and select Recommend Now from the context menu.
- After PRTG analyzes your device, it suggests a list of sensors that are useful for a more comprehensive monitoring.
- Click Add These Sensors in a table row to add all sensors in this row to the analyzed device.
👆 If you do not see this option, make sure that the Recommended Sensors Detection in the Monitoring settings (Setup --> System Administration --> Monitoring). Probe devices do not support this option.
14. Change notifications for every single sensor
PRTG uses notifications to send you an alert, for example, whenever PRTG discovers a defined sensor status or when channels breach specific limits. You can define an unlimited number of notifications using one or more notification methods. This setting can be broken down to each individual sensor for further personalization.
In this example, a ticket notification is added to a sensor in addition to email notification:
Thus, you can configure both the quantity and the type of notification of each sensor individually. More information about notifications in PRTG can be found here:
👉 PRTG Manual: Notification Templates
👉 PRTG Manual: Notification Delivery
👉 PRTG Video Tutorial: Alerts and Notifications
15. Easy navigation in the menu bar
A simple, but nonetheless very helpful feature for quick navigation in PRTG is a
double-click in the device navigation bar. This allows you to quickly switch from one device to the parent group containing other devices of the same type. In this example we use this feature to go from viewing a specific router to all routers in a group:
If you would like more info about the structure of the PRTG web interface, take a look at this page:
And with those last five pointers, you've now learned 15 things about PRTG that will help you work more efficiently with our software.
Did you already know all the features and functions? Did you miss something? I am looking forward to your comments!