.jpg) Published by Jasmin Kahriman
Published by Jasmin Kahriman
Last updated on April 08, 2026
•
6 minute read
On the 29th of April 2021, Buffalo celebrated 18 years of business in the network-attached storage world. Their initial focus was home and Small Office/Home Office (SOHO) users. With the further development of TeraStation, it has been expanded to SMB (small and medium business) users. The first TeraStation model, the HD-HTGL/R5, released in December 2004 and received a lot of attention with a chassis that can house four drives and a full-sized power unit while keeping a compact form factor. Today’s TeraStation supports 10GbE speed, cloud integration capability, and the most robust physical and logical data security features ever provided on a TeraStation.
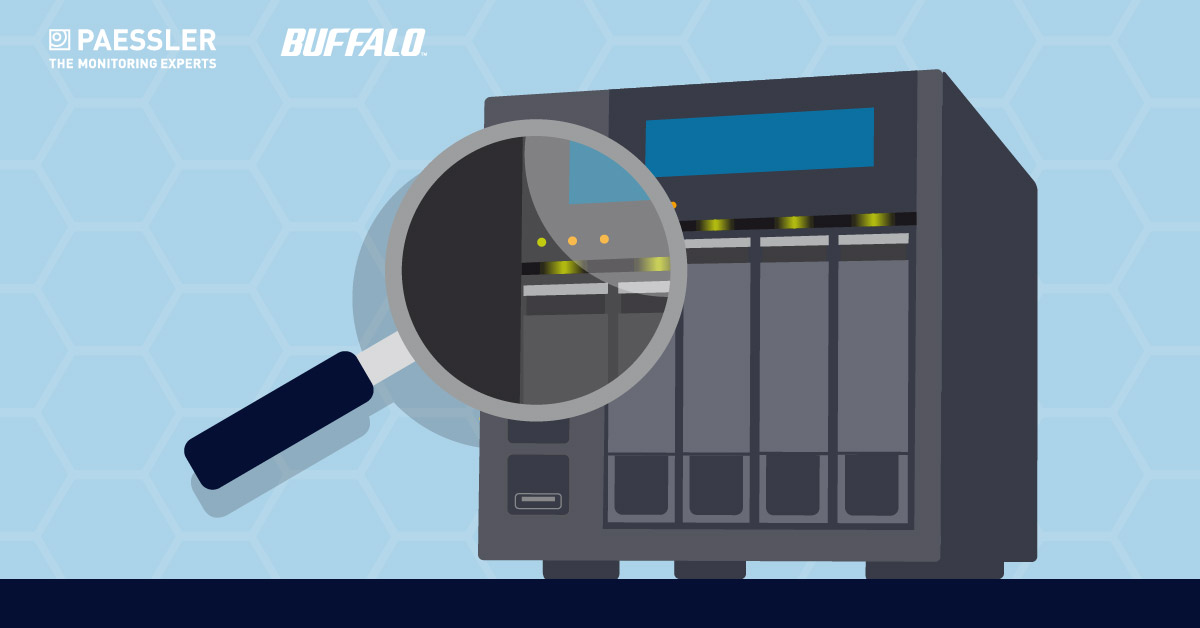
The TeraStation has integrated system monitoring capabilities, but these are only intended for monitoring internal components within the TeraStation box. In today’s heterogeneous network environment, we want to use a centralized network monitoring product that can monitor not only the TeraStations but everything else that understands TCP/IP. That's where Paessler PRTG comes into play - an all-in-one monitoring solution.
Buffalo and PRTG speak SNMP, the most-used network monitoring protocol. PRTG has a native SNMP sensor for monitoring the health state of your Buffalo TeraStation NAS. This sensor shows if there are any warnings or error messages, the uptime status, firmware version, and failover status (if any). It supports the following TeraStation systems: 3000, 3010, 3020, 5000, 5010, 6000, and 7000 series.
In this article, I will show you the procedure of enabling SNMP on your Buffalo TeraStation and monitoring using Paessler PRTG sensors.
Step 1: Enable SNMP on Buffalo TeraStation
In the first step, you need to enable SNMP on your Buffalo TeraStation. The instructions below are from 3000 series and may differ from model to model. Please refer to the vendor's documentation.
- Launch your web browser and open Buffalo TeraStation IP.
- Navigate to Network > SNMP and then click on the button for configuring SNMP settings.
- Choose SNMPv2 or SNMPv3 and configure a community string (SNMPv2) and authentication and encryption (SNMPv3). In addition to that, you can also enable SNMP Traps.
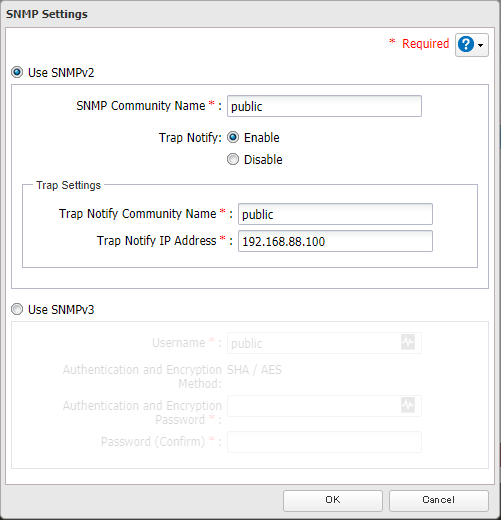
4. Click OK and log out from UI.
Step 2: Use SNMP Buffalo TS System Health Sensor
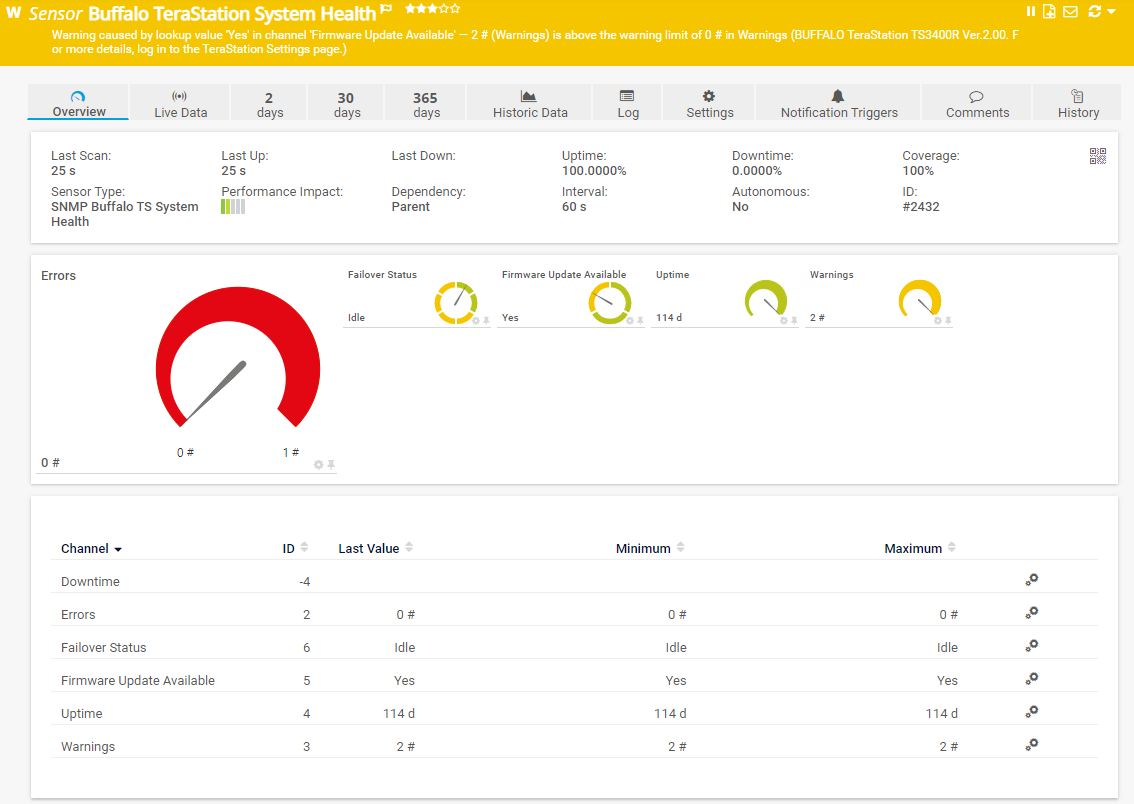
The SNMP Buffalo TS System Health sensor monitors the system health of a Buffalo TeraStation network-attached storage (NAS) unit via the Simple Network Management Protocol (SNMP). It supports IPv6 and it has a low impact on the Paessler PRTG core server.
It has predefined limits for several metrics. You can individually change these limits in the channel settings. This sensor uses lookups to determine the status values of one or more channels. This means that possible states are defined in a lookup file. You can change the behavior of a channel by editing the lookup file that the channel uses.
As you can see in the screenshot below, my sensor has detected a new firmware version. Based on the configured limits, I've received a notification about it and can act accordingly.
Note: In certain cases, this sensor might show an error message. If you encounter such an issue, open the settings of the parent device, section SNMP Compatibility Options, and set the Walk Mode to Use GETNEXT requests.
Step 3: Extend monitoring using device template
The Buffalo TS System Health sensor is useful but it doesn't show all the metrics you might need. By using the native device template „Buffalo TeraStation NAS“ you can extend monitoring to network traffic, S.M.A.R.T. disk status, disk capacity, RAID status, iSCSI status, memory, and load average. In the screenshots below you can see the S.M.A.R.T. disk status and RAID status.
You can run the device template by clicking on the Buffalo TeraStation NAS device > Auto-Discovery > Run Auto-Discovery with Template.
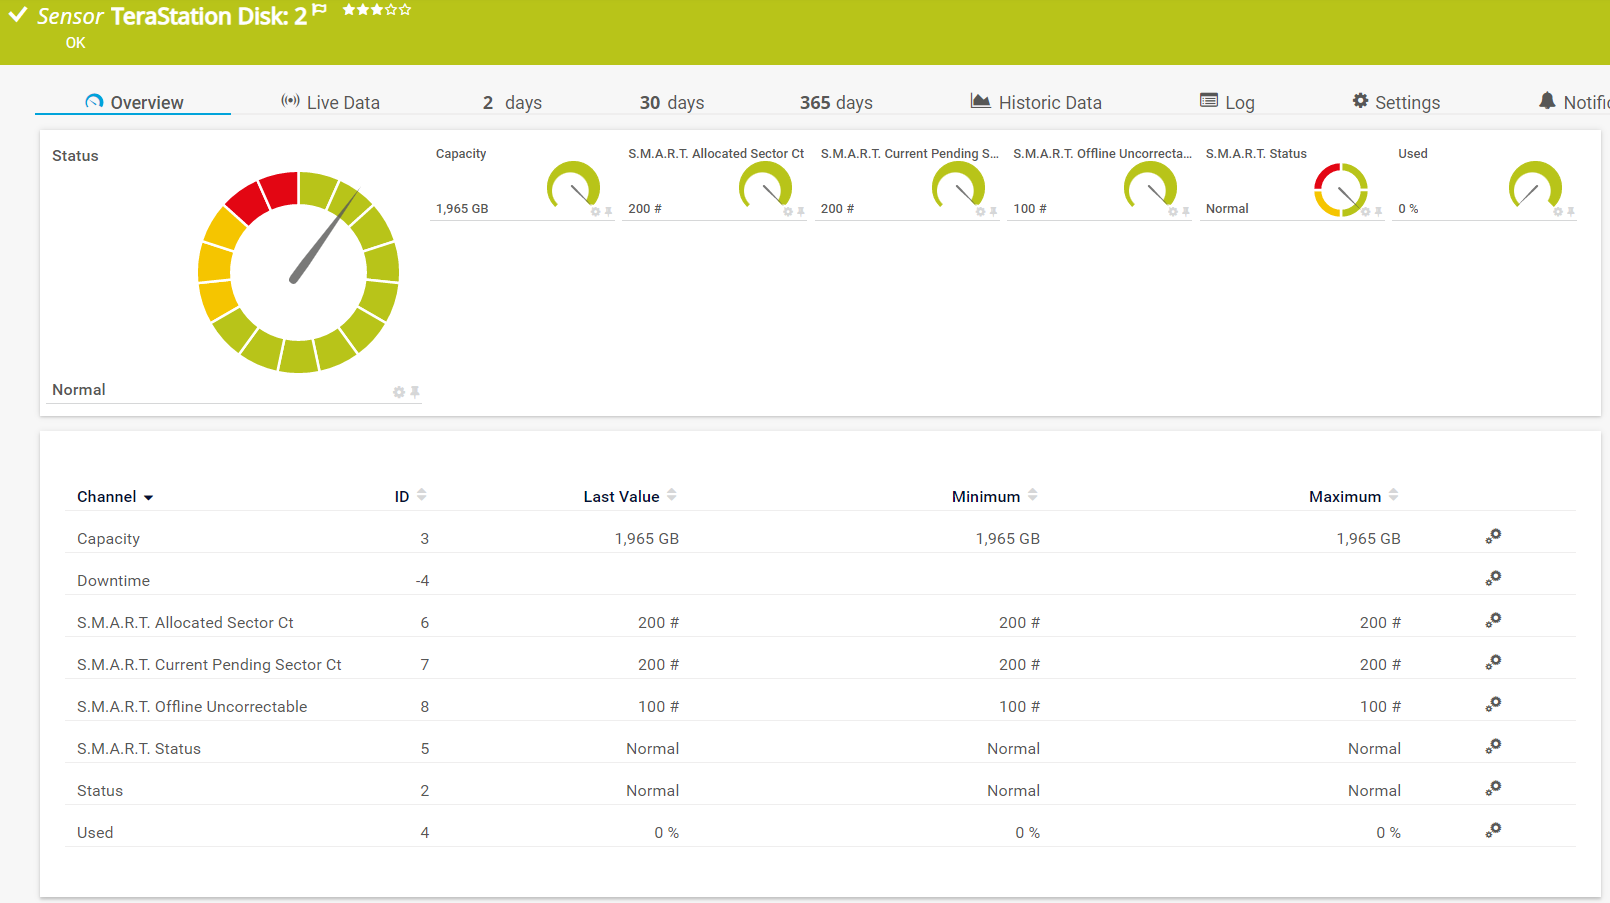 S.M.A.R.T. disk status
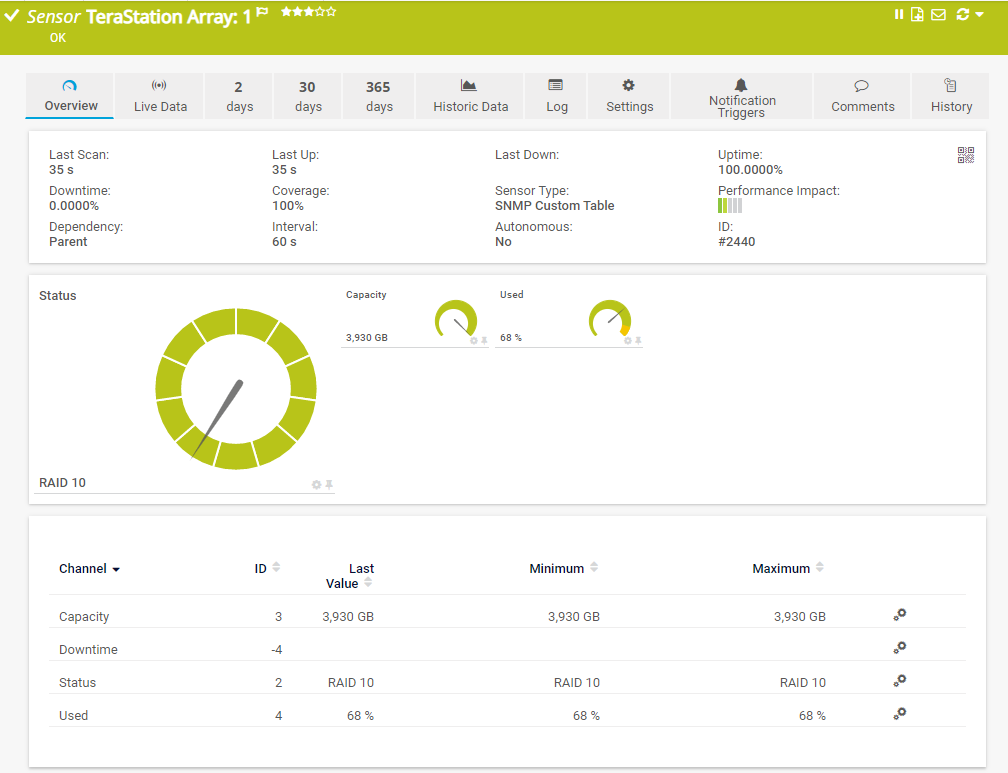 Disk capacity and RAID status
In case of any warnings or errors related to your Buffalo TeraStation, PRTG will inform you using notification templates. At first, you need to ensure that the right person or team gets the right notifications, and then trigger notification to Microsoft Teams, push notification, or some other notification mechanisms.
I hope you enjoyed reading this article. Until the next article, stay safe and healthy.