 Published by Simon Bell
Last updated on January 23, 2024
•
6 minute read
Back in the mists of time (March 2019), I wrote a blog post describing how a REST Custom sensor can be used to read energy consumption data from a Sonoff POW2 smart switch. One of the cool features provided by the Tasmota custom firmware used in that project is support for the MQTT protocol.

As you'll know from this recent blog post, PRTG now includes an MQTT Subscribe Custom sensor. This provides an alternative method for pulling energy data from the Sonoff POW2.
I’m not going to go into detail about the “hows & whys” of the MQTT protocol, because we’ve already covered that in other posts:
MQTT broker
For this to work, you need to have an MQTT broker running either in your local network, or reachable from it; if you’re using a cloud-hosted broker service. In my example, I’m running the popular Mosquitto broker as a service on a Synology NAS device.
One of the nice things about MQTT is how little configuration is needed from the server (broker) side. Basically, you just install the service and it’s immediately available for use.
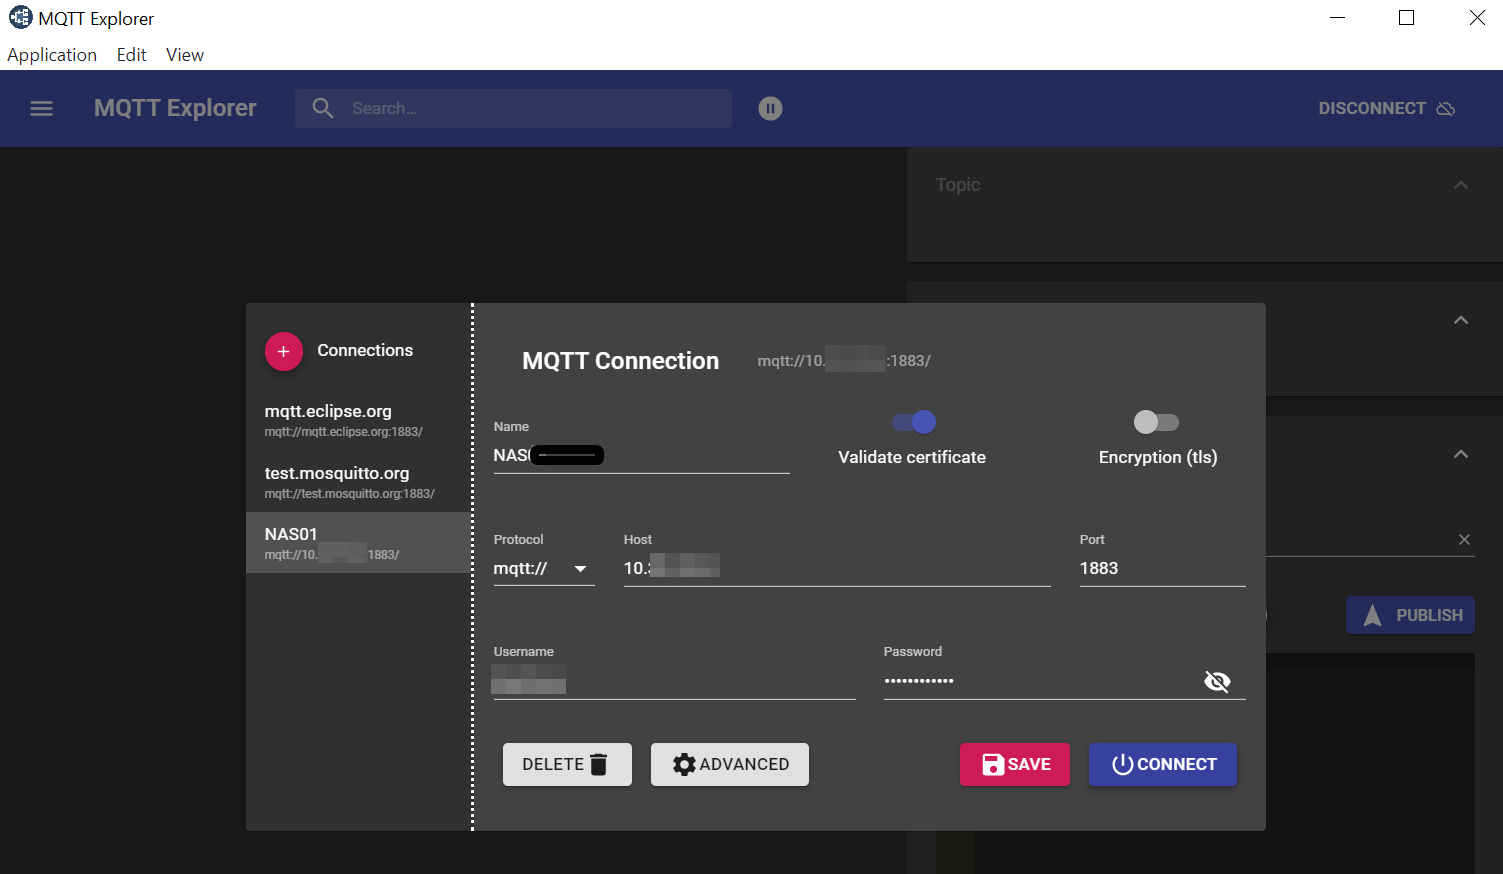
The downside is that it’s not always easy to see what’s happening on the broker. Fortunately, there are some great open-source tools available to get around that. My current favorite is MQTT Explorer. Once you’ve installed your broker, fire up MQTT Explorer and add a new connection to the broker – The default MQTT port is 1883:
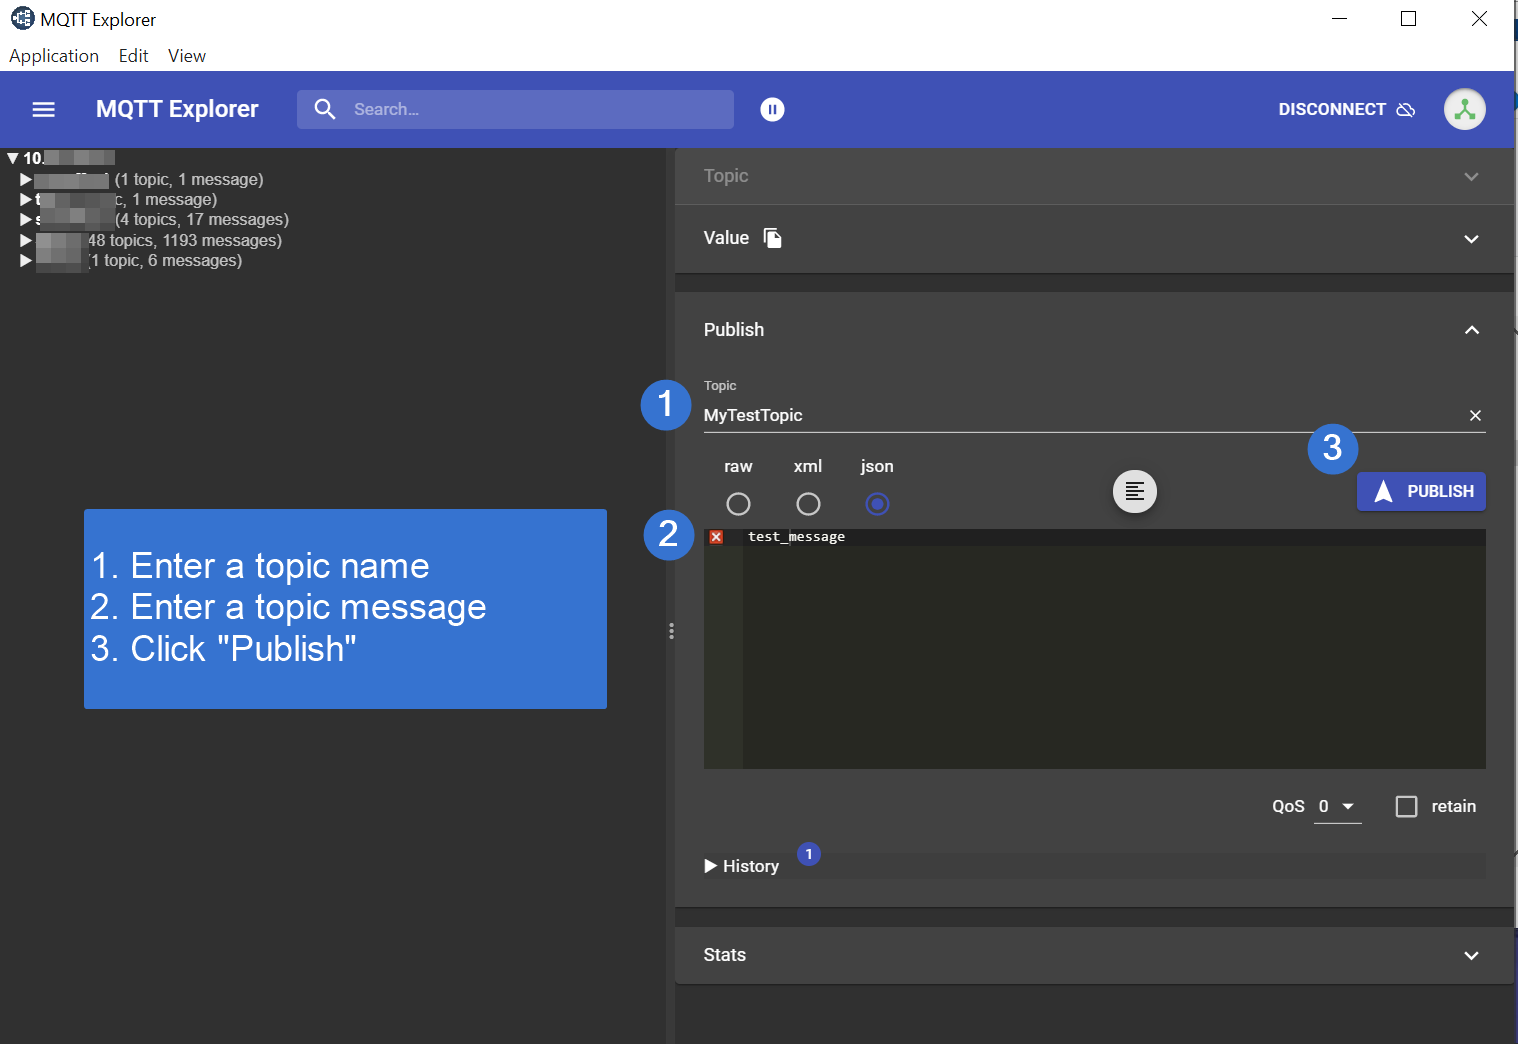
Once you connect to the broker, you can use the Publish panel to create a new MQTT topic and a test message:
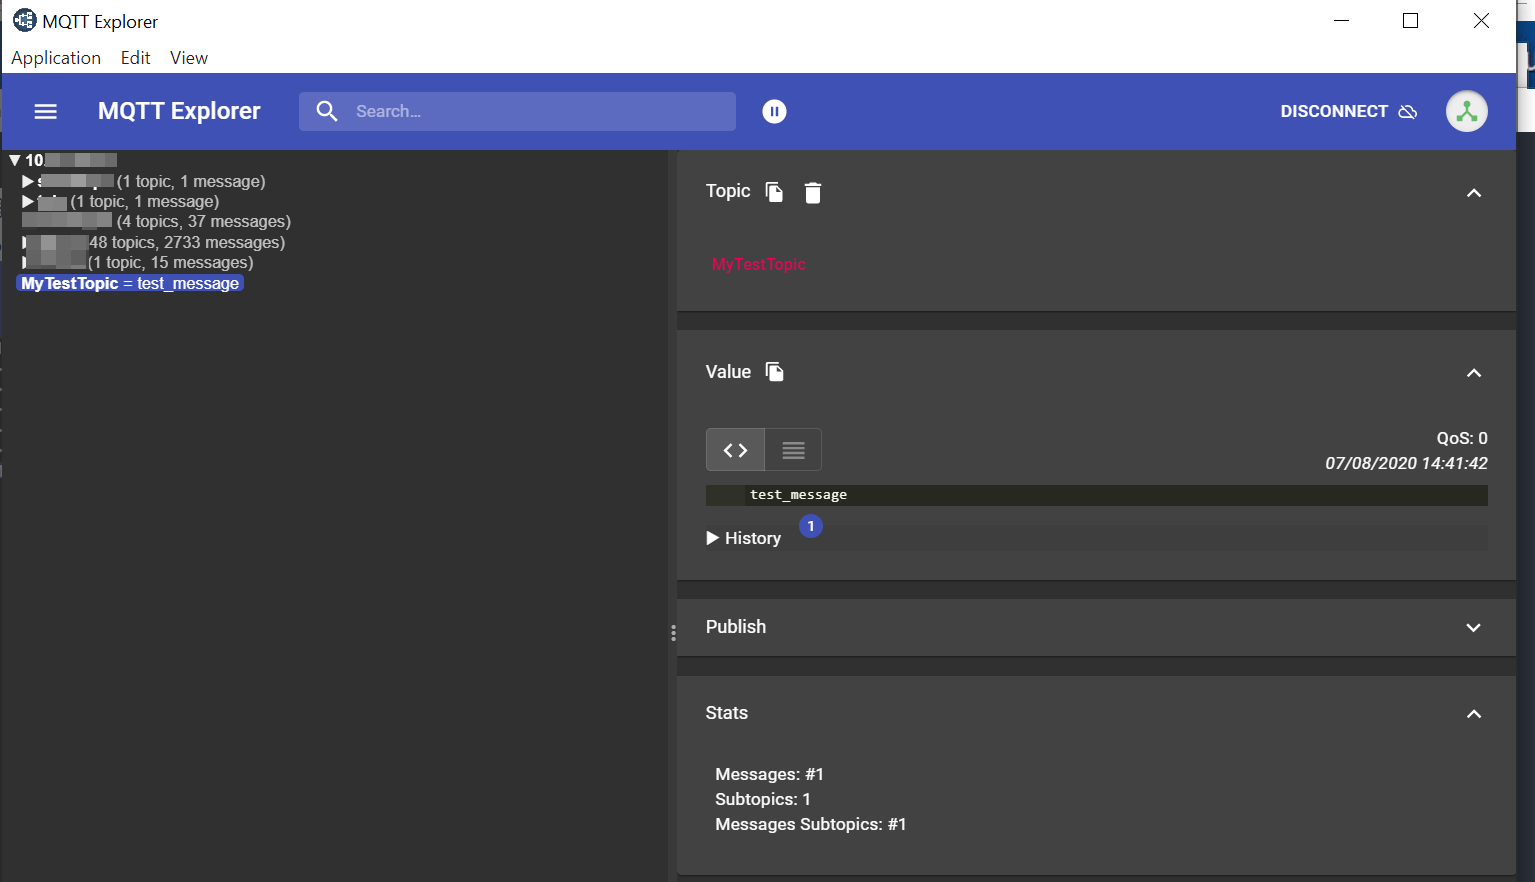
If the broker is working properly, the new topic and message should appear in the message list in the left-hand panel:
Prepare the Sonoff
Once the broker is configured, you’ll need to read the previous Sonoff Smart Meter post and follow the instructions for updating the device with the Tasmota firmware. When successfully updated, you should be able to open your web browser to the IP address of the POW2:

From there, click the Configuration button and then Configure MQTT. Fill in the fields as shown. For an explanation of Prefix/Topic choices, please see the Really Understanding MQTT video, linked in the introduction above.
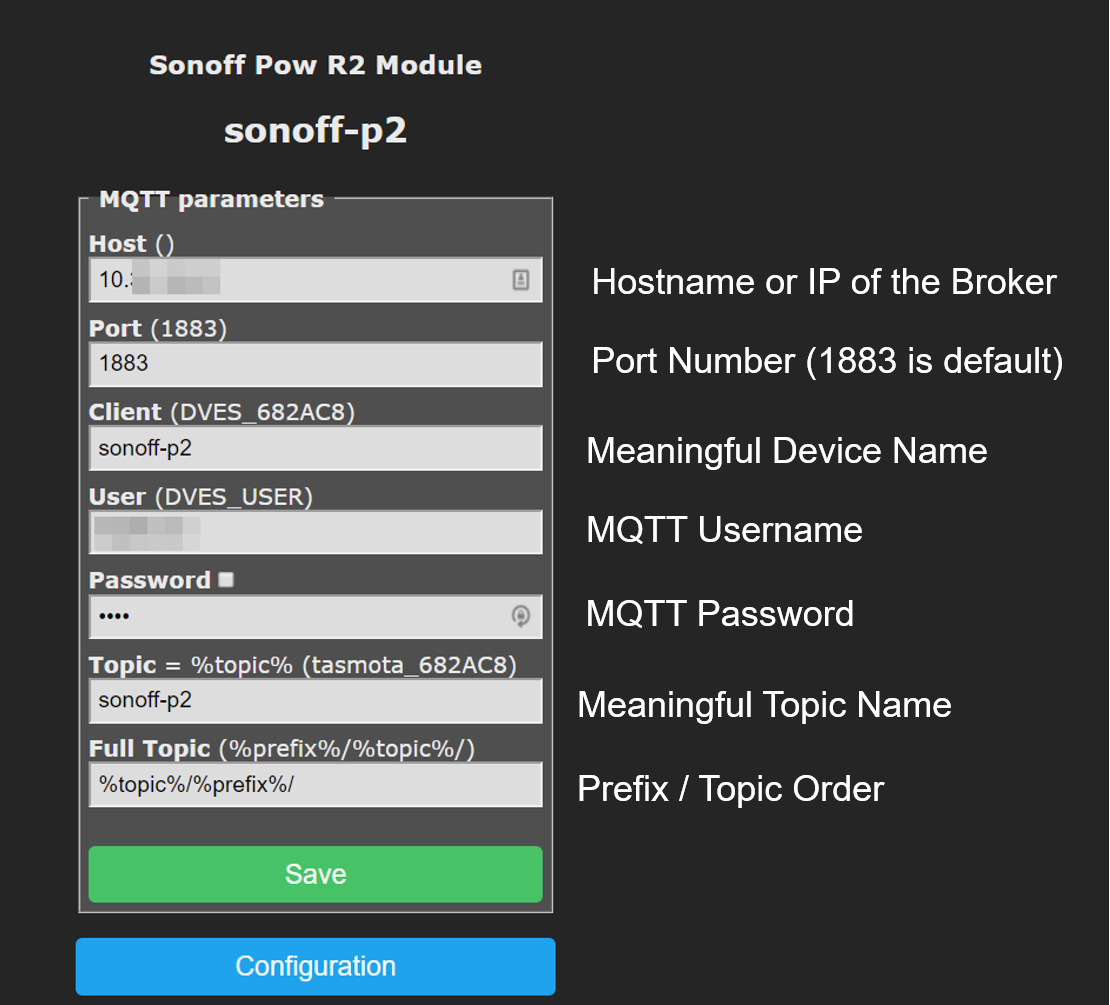
Finally, click Save and the Sonoff will restart, after which the new MQTT settings will be active.
Back in MQTT Explorer, you should now see the newly published Sonoff topic, along with the data it contains:
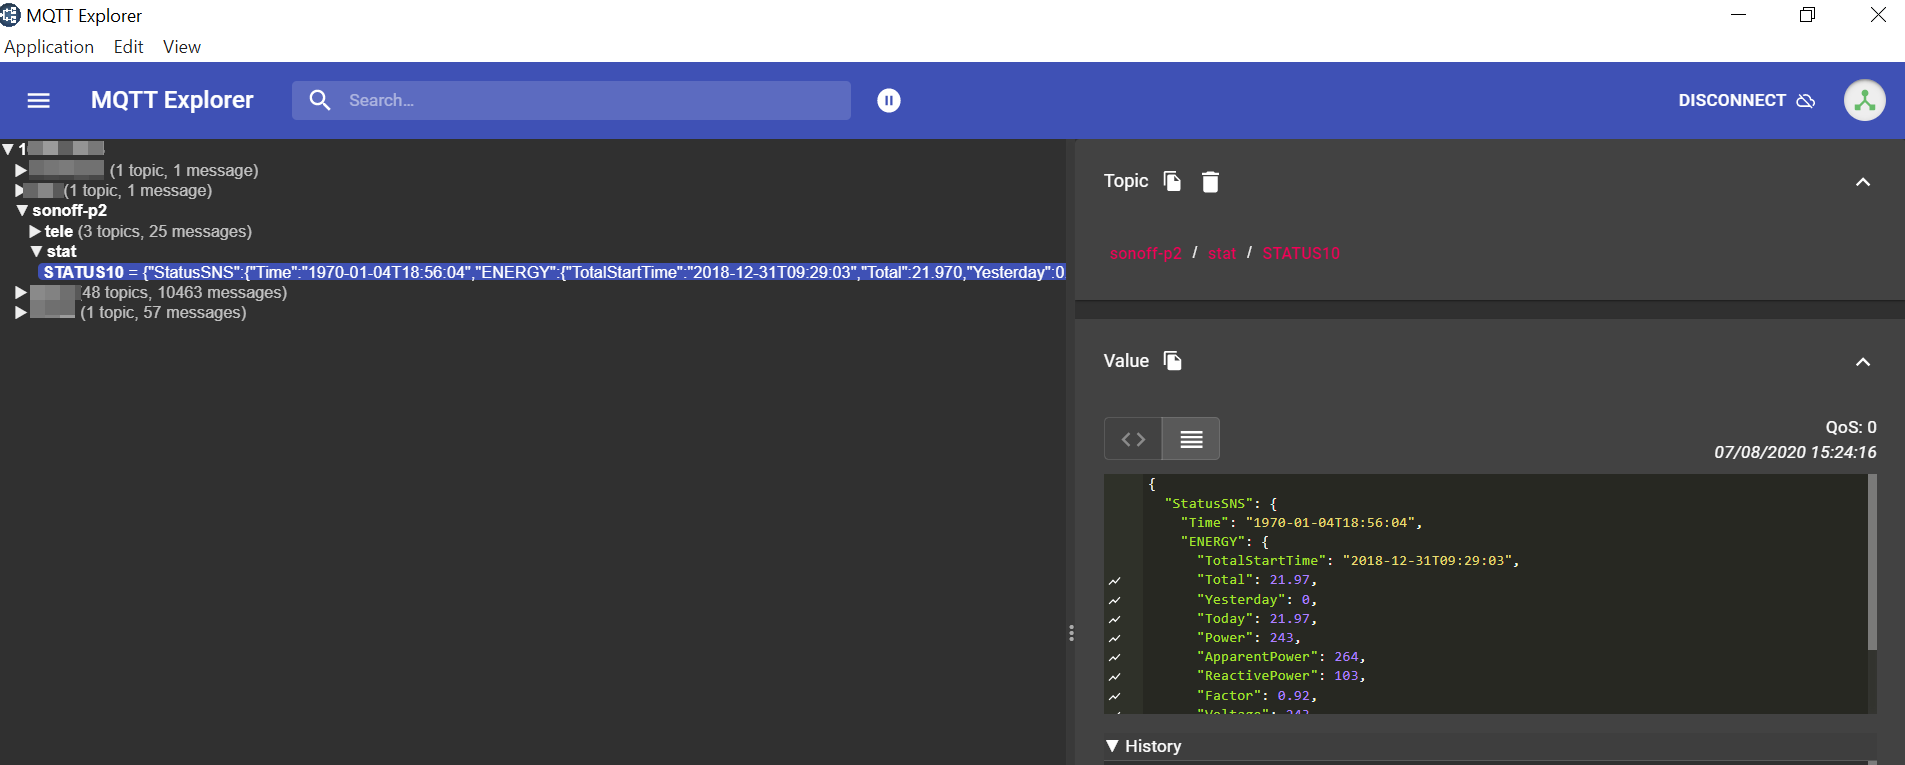
Take a note of the topic definition in the red text on the right. We’ll need this to set up our sensor. Click the button with the stack of horizontal lines above the return value window to see the data in a neat JSON format.
As you’ll have seen in the blog post about the new MQTT Subscribe Custom sensor, the sensor channels are defined using the JSONpath of the MQTT values. The JSON experts will be able to work out the required paths from the data returned by MQTT Explorer. But for us normal people 😉, there is a free online tool called jsonpath.com that can do this for us.
Parsing the MQTT data
Copy all of the JSON data from the Value panel in MQTT Explorer – make sure you include ALL the curly brackets (braces) or unpleasant things will happen. Open a browser to this page and paste the JSON data into the left-hand panel, replacing any data that is already there:
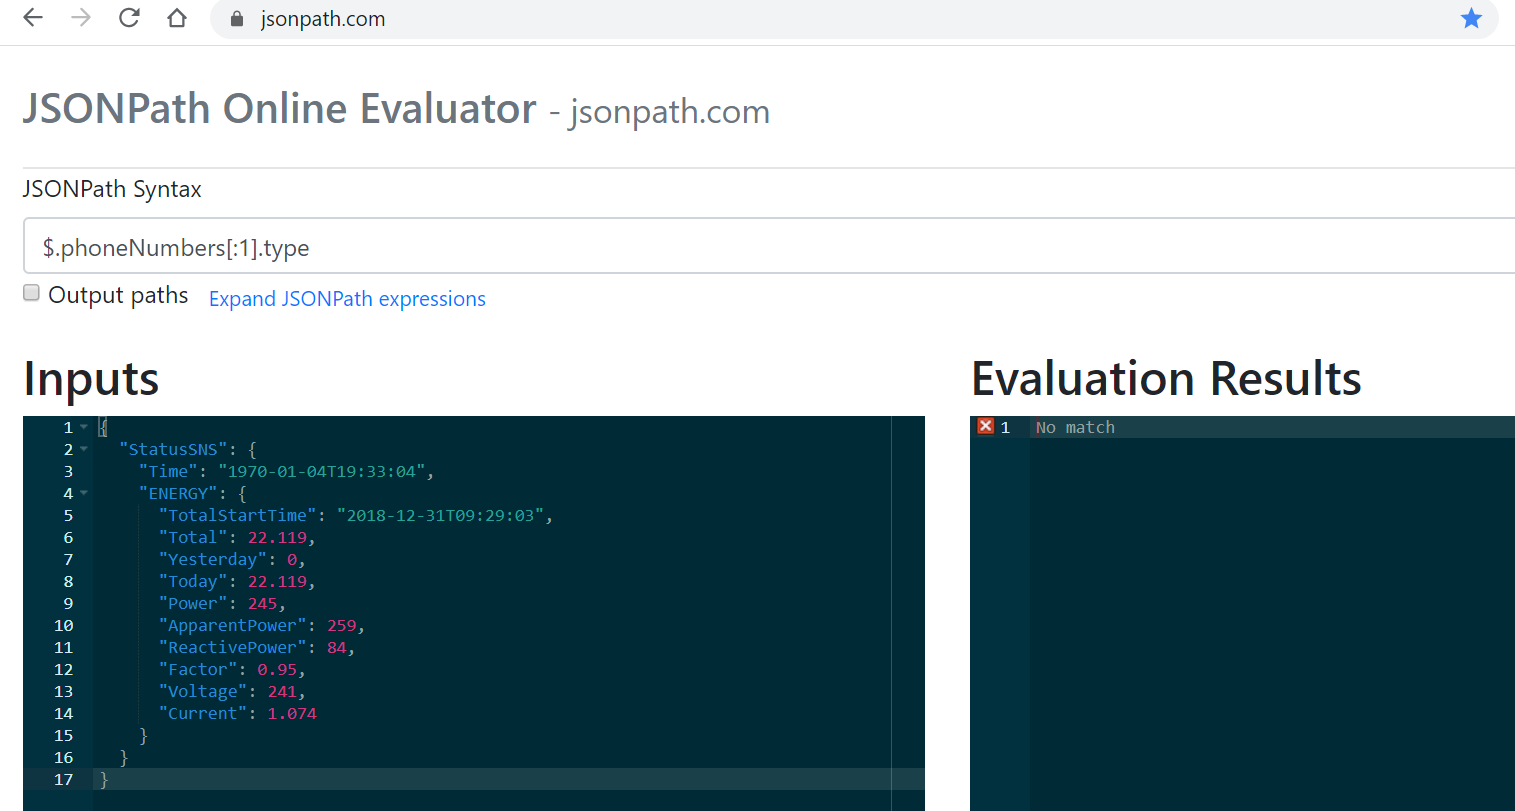
Following the example syntax provided in the JSONPath query box (it relates to the sample data we just overwrote), start to explore the structure of your JSON data. For example, the JSONPath to the Voltage value looks like this:
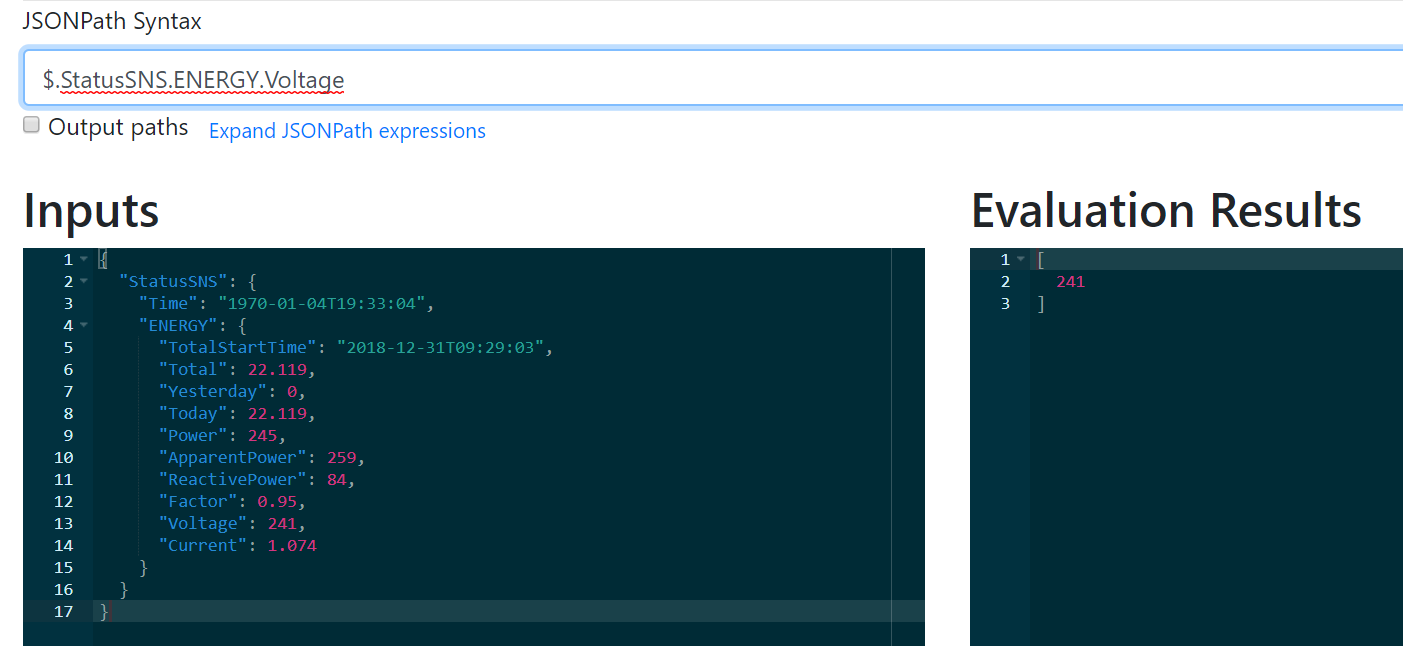
These are the JSONPaths we need to define our sensor channels, so decide which you want to use and make a note of them. Don’t forget that the path names ARE case sensitive, so if your query isn’t returning the correct data, check the case of your path query.
The PRTG bit
So now that we have the JSONPaths for the channels we want to use, we can finally create our sensor! Although the data is being sent from the Sonoff device, PRTG is retrieving it from the broker, so the MQTT Subscribe Custom sensor needs to be added to the device hosting the broker, NOT the Sonoff itself.
Add the MQTT Subscribe sensor to the broker device:
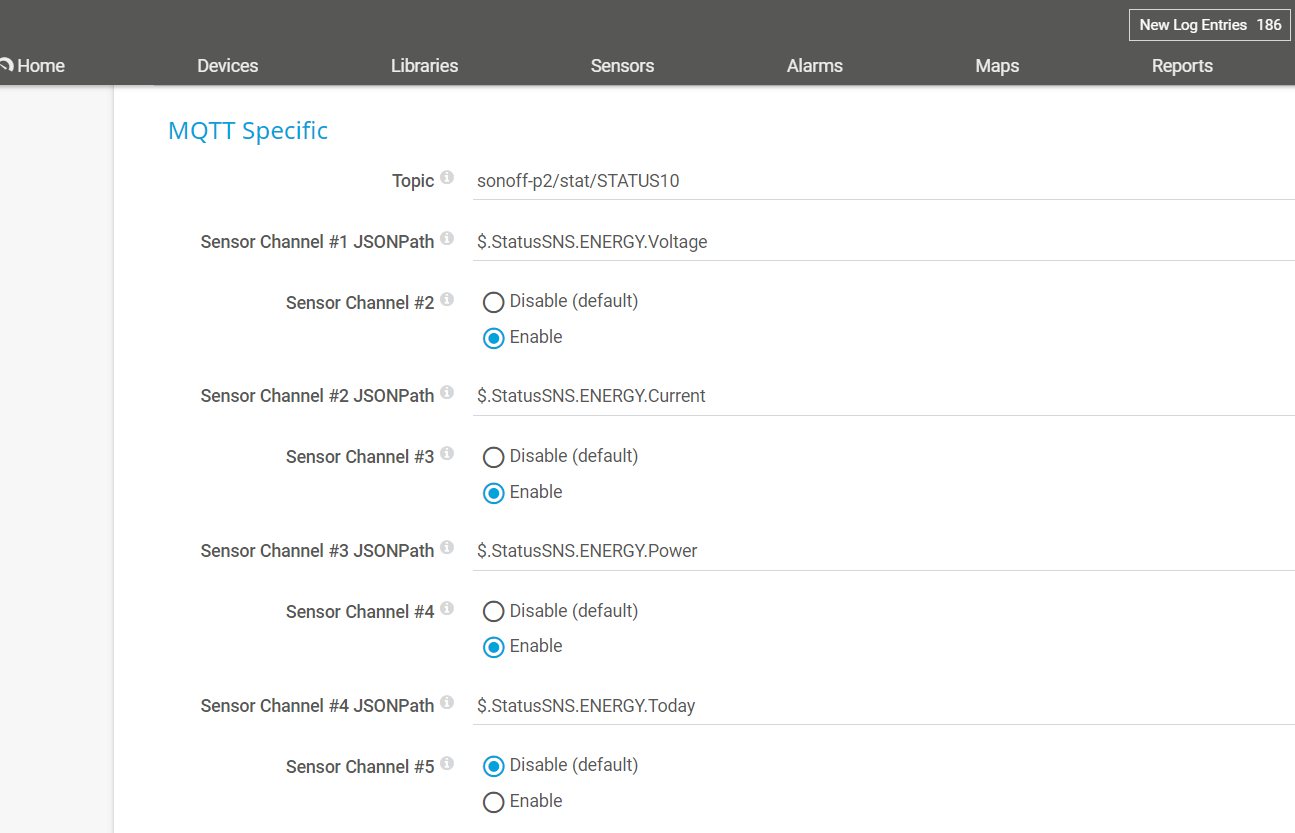
The Topic is the red text we copied from MQTT Explorer earlier (I told you we’d need it), with the spaces removed. The channel definitions are the JSONPaths we made a note of using the online parser.
As soon as PRTG has queried the broker and created the channels, you can edit them to add the unit labels to each one:
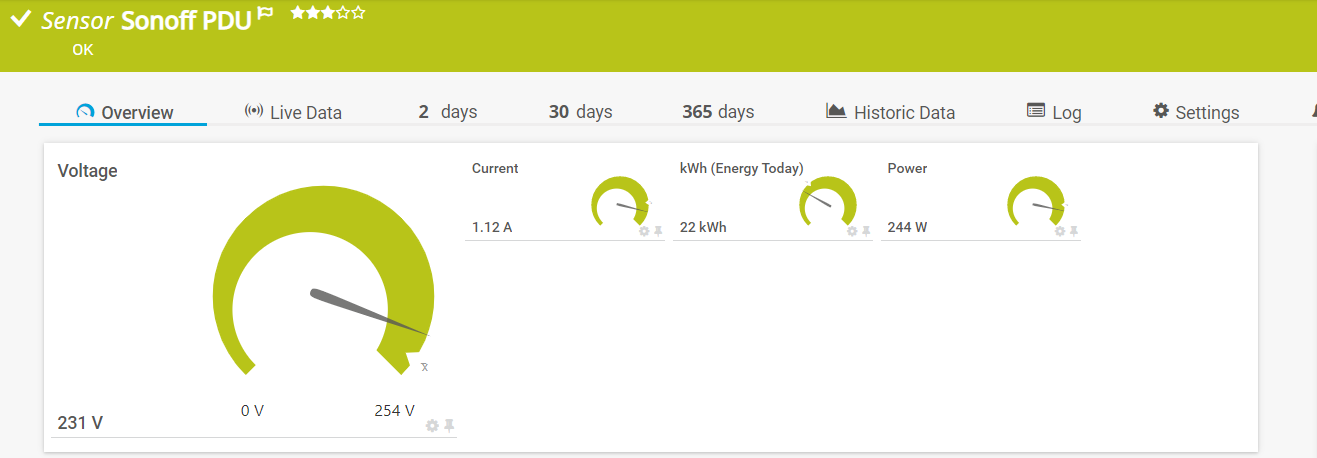
Although this post explains how to extract energy usage data from a Sonoff POW2 smart switch using MQTT, the same tools and techniques can be applied to any device that supports MQTT!
As always, we’d love to hear about your projects and how you use PRTG in IoT applications. Just drop us a comment below.