 Published by Michael Becker
Last updated on July 13, 2026
•
15 minute read
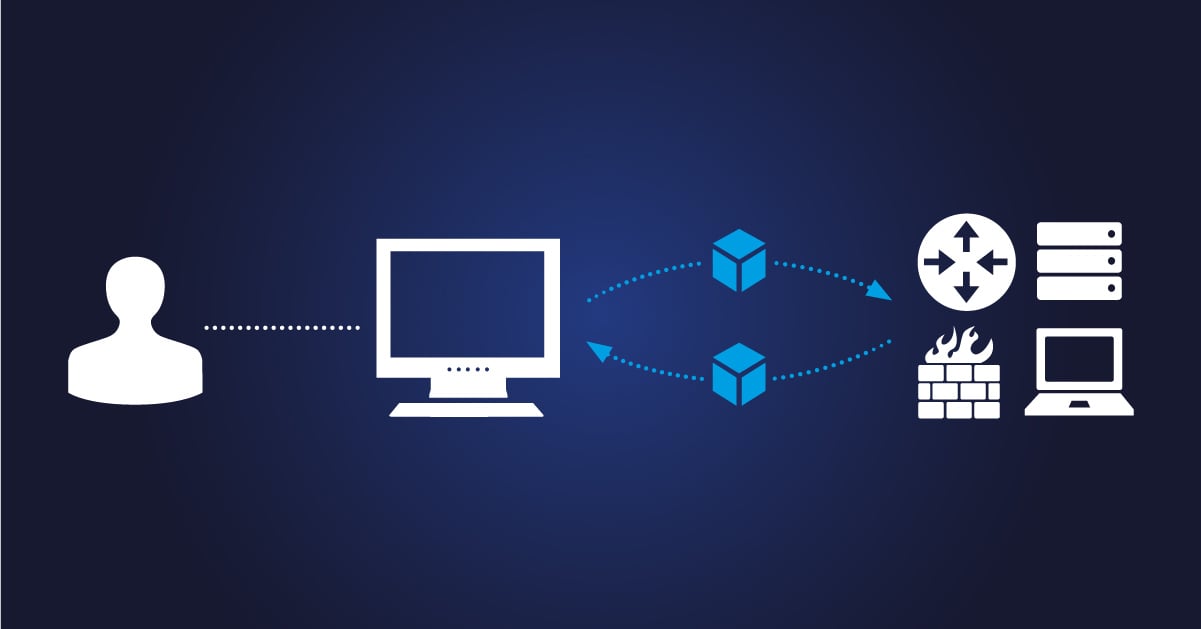
Monitoring network devices is a must-have for network admins, but they need to do it securely. The Simple Network Management Protocol (SNMP) has helped millions of admins collect information and monitor networks over the past several decades. SNMP has had security improvements over the years, and that has resulted in three versions, v1, v2c, and v3, but the first two send information unencrypted.

SNMPv3 features authentication and encryption in order to keep network monitoring as safe as possible.
This tutorial shows you how to enable and configure SNMPv3 on Windows and Linux, as well as how SNMPv3 differs from SNMP v1/v2c.

Understanding SNMPv3: What Makes It Different?
SNMP lets routers, switches, servers, and other SNMP-aware devices pass performance data to network monitors. SNMP v1 was the original open standard, but its design was incomplete and didn’t account for security. SNMP v1 uses community strings to authenticate queries (community strings are just plaintext passwords).
SNMP v1: The Foundation
SNMPv1 is the earliest open standard that saw widespread adoption for network management. As groundbreaking as it was for its time, it has absolutely no security. This version has community strings, or plaintext passwords as authentication, so packets can be easily eavesdropped or faked.
SNMPv2c: Performance Without Security
SNMPv2c included 64-bit counters for more precise bandwidth monitoring and introduced the GetBulk operation for efficient retrieval of large datasets, and improved error recovery mechanisms. It can manage large-scale network devices more easily than its predecessor. The security in SNMPv2c has not been improved since SNMPv1, because community strings are still transmitted in clear text, and there is no encryption or secure authentication.
SNMPv3: Security-First Approach
SNMPv3 is designed to overcome the serious security flaws of the earlier versions of the protocol. The security related features of SNMPv3 are:
🔐 Authentication (identify the sender of a message) using either MD5, SHA-1 (per RFC 3414) and, where supported by the agent/manager, SHA‑2 (SHA‑224/256/384/512 per RFC 7860)
🔐 Encryption (message confidentiality) using DES (required by RFC 3414), AES‑128 (RFC 3826) and, depending on the implementation, AES‑192/256 or 3DES
🔐 Access Control to specific pieces of information using a View-Based Access Control Model (VACM)
The security services are available through three architecture components: Views (what information a user can access), Groups (what access, read-only or read/write, a user has), and Users (credentials for SNMP clients and specific access rights for these users).
This is known as the User-Based Security Model (USM) of SNMPv3. Only users allowed to access specific Object Identifiers (OID) in a Management Information Base (MIB) can access that information.
📺 For a detailed walkthrough of how Views, Groups, and Users work together in SNMPv3, check out this video tutorial on SNMPv3 configuration that explains the concepts with practical examples.
SNMPv3 Configuration on Windows
Windows lacks built-in SNMPv3 support (unlike Linux). The SNMP service was deprecated by Microsoft starting with Windows Server 2012, and was made an optional Feature on Demand in Windows 10/11 (1809+). The Microsoft SNMP service only provides support for v1/v2c; a third‑party agent is required for SNMPv3.
Installing a Third-Party SNMPv3 Agent
There are a number of solutions that offer SNMPv3 support for Windows. For a production environment, one could use a commercial product, such as the NuDesign SNMPv3 Agent Service, which installs easily and is a drop in replacement for the Microsoft SNMP Agent Service.
Net-SNMP is an open source alternative, available at no charge, however, it is a bit more complex to install and configure under Windows when compared to its much simpler installation on Linux.
NuDesign SNMPv3 Agent Features:
✅ Supports Windows Server 2025, 2022, 2019, 2016, and 2012 R2
✅ Supports Windows 11, Windows 10, Windows 8/8.1, and Windows 7
✅ Supports 32-bit and 64-bit versions
✅ Supports IPv4 and IPv6
✅ Supports SHA-256, SHA-384, SHA-512 for authentication and AES-128, AES-192, AES-256 for privacy
Installation Process
Install a trial of the SNMPv3 agent from the vendor website. The installation process will stop the native Microsoft SNMP service if it is running and set the startup type to Manual.
If there are any other third party SNMP agents running (i.e. Net-SNMP) you must stop those services before the NuDesign SNMPv3 agent will operate correctly.
Configuring the SNMPv3 Agent on Windows
After installation, launch the NuDesign SNMP v3 agent configuration applet:
📌 Navigate to the installation directory (typically C:\Program Files\NuDesign Tools Eval)
📌 Run the configuration tool and select SNMPv3 as the protocol
📌 Configure the UDP port (default is 161)
📌 Under Authentication settings, specify which IP addresses can query the agent and add your network monitoring solution's IP address
📌 Configure User Security Management (USM) credentials with custom username, authentication password, and encryption key
The agent uses separate configuration files for security settings. Always change the default credentials (shaaes/shaaesauth/shaaespriv) to custom values for production use.
Testing SNMPv3 on Windows
Validate with snmpwalk/snmpget built for Windows (e.g., Net‑SNMP binaries) or your NMS (Network Monitoring Solution); ensure it supports your chosen algorithms (e.g., SHA‑2/AES‑256). You can also test your SNMP responses with PowerShell, though it has no built-in SNMPv3 cmdlets. Testing typically relies on external tools (e.g., snmpwalk) or vendor modules.
Windows Management Instrumentation (WMI) Alternative
Keep in mind that when you are setting up SNMPv3 on Windows, you may use WMI for Windows‑specific data; for cross‑platform device monitoring, SNMP remains the standard.
SNMPv3 Configuration on Linux
Linux operating systems commonly provide SNMPv3 via the Net‑SNMP package, making configuration straightforward on distributions like Ubuntu, Red Hat, and others.
Installing SNMP on Linux
First, install the necessary SNMP packages. On Ubuntu or Debian-based systems, use the following commands for nano editor:
sudo apt-get update
sudo apt-get install snmpd snmp libsnmp-dev
For Red Hat-based distributions:
sudo yum install net-snmp net-snmp-utilsCreating SNMPv3 Users
The net-snmp package provides a convenient helper script for creating SNMPv3 users. Stop the snmpd service before creating users:
sudo systemctl stop snmpdCreate an SNMPv3 user with authentication and encryption:
sudo net-snmp-create-v3-user -ro -A AuthPassword123 -a SHA -X PrivPassword456 -x AES snmpuser
sudo systemctl start snmpd
⚠️ Use at least 8+ characters and distinct auth/priv passphrases; if your Net‑SNMP build supports it, prefer SHA‑2 (e.g., -a SHA-256).
This command creates a read-only user named "snmpuser" with SHA authentication and AES encryption. The script automatically adds configuration entries to /var/lib/net-snmp/snmpd.conf and /etc/snmp/snmpd.conf.
Configuring the snmpd.conf File
Edit the main configuration file to define access permissions and listening interfaces:
sudo nano /etc/snmp/snmpd.confAdd or modify these key settings:
# Listen on all interfaces
agentAddress udp:161

# Define rocommunity for backward compatibility (optional)
rocommunity public localhost

# Configure system information
syslocation "Data Center Room 101"
syscontact admin@example.com
The configuration file (/etc/snmp/snmpd.conf) controls which IP address ranges can query the SNMP agent and which MIB objects are accessible. For enhanced security, restrict access to specific IP addresses:
# Allow only specific IP to query
rocommunity secret 192.168.1.100
Starting and Testing the SNMP Daemon
Enable and start the snmpd service:
sudo systemctl enable snmpd
sudo systemctl start snmpd
Verify the service is running:
sudo systemctl status snmpdTest the SNMPv3 configuration locally:
snmpwalk -v3 -l authPriv -u snmpuser -a SHA -A AuthPassword123 -x AES -X PrivPassword456 **-r 1 -t 3** localhost **1.3.6.1.2.1.1**Firewall Configuration
Ensure your firewall allows SNMP traffic on UDP port 161 from trusted subnets only:
sudo ufw allow from **192.168.1.0/24** to any port 161 proto udp
Or for firewalld:
sudo firewall-cmd --permanent --add-port=161/udp
sudo firewall-cmd --reload
SNMPv3 and its usage in IT Monitoring
SNMPv3 is an essential component of any effective monitoring plan, and a number of IT monitoring solutions inlcude SNMP support for collecting real-time performance statistics. Monitoring solutions send queries to SNMP agents to collect information about:
🎯 Interface counters: bandwidth, traffic rates, packets in/out, errors, and discards
🎯 System health: CPU usage, free memory, disk usage, and temperature sensors
🎯 Network elements: Router/switch statistics, Cisco device monitoring and port states
🎯 Alerting/notifications: SNMPv3 traps and informs administrators of important events
Metrics are organized in a hierarchical structure within MIBs and assigned an Object Identifier (OID). Each metric (e.g., CPU temperature, interface speed, system uptime) is referenced by its specific OID in the respective MIB.
Security Levels in SNMPv3
SNMPv3 supports three security levels:
▪️noAuthNoPriv: No authentication and no encryption. Only a username is required (no password). This is the least secure option and similar to SNMPv1 in terms of security.
▪️authNoPriv: Authentication with password but no encryption. Messages are authenticated but transmitted in clear text, similar to SNMPv2c in terms of missing encryption.
▪️authPriv: Both authentication and encryption (recommended for production).
For secure monitoring, always use the authPriv security level, which combines authentication protocols (SHA preferred over MD5) with encryption (AES-128 or higher recommended).
Troubleshooting SNMPv3
Common troubleshooting steps include:
▪️ Verify that authentication and encryption keys match between agent and monitoring system, including the SNMP EngineID association
▪️ Ensure username is correctly configured on both sides
▪️ Check that passwords and encryption keys are longer than 8 characters
▪️ Confirm firewall rules allow UDP traffic on port 161 for queries and port 162 for traps
▪️ Use snmpwalk to test connectivity and verify accessible OIDs
▪️ Review the snmpd service logs on Linux (/var/log/syslog or journalctl -u snmpd)
Performance implications
Authentication and encryption of SNMPv3 messages requires additional computational resources, so when compared to SNMP v1/v2c, it may have a heavier impact on CPU when polling hundreds of nodes, with very short polling intervals on both SNMP agent and monitoring server:
✨ Spread SNMPv3 sensors across multiple monitoring probes
✨ Increase scanning intervals for less critical metrics
✨ Use SNMP performance metrics to identify bottlenecks
✨ Consider SNMPv2c only if risk is acceptable and traffic is strictly controlled; prefer SNMPv3 (authPriv) wherever feasible
Integrating SNMPv3 with PRTG Network Monitor
After you have set up SNMPv3 on your Windows and Linux devices, it’s time to pair them with a powerful monitoring solution that can give you full visibility into your entire IT environment. Paessler PRTG Network Monitor supports SNMP v1, SNMP v2c, and SNMPv3 and has pre-configured sensors that automatically detect and monitor devices in your network.
With PRTG, you can use these SNMP features and sensors:
▪️ SNMP Traffic sensor: Bandwidth and network interface statistics
▪️ SNMP Hardware Status sensor: CPU, memory, fans, and power supplies
▪️ SNMP Custom sensor: Create your own for specific OIDs
▪️ SNMP Trap Receiver: Receive notifications & process traps (SNMPv2c)
▪️ SNMP Library sensor: Pre-configured sensors for Cisco, HP, Dell, and more vendors
To use SNMPv3 credentials with PRTG, go to the device settings and select SNMPv3 as the protocol, then provide your SNMPv3 user credentials, including username, authentication protocol (SHA), authentication password, encryption method (AES), and data encryption key. PRTG then automatically applies these credentials to all SNMP sensors for this device.
PRTG also self-monitors its own SNMPv3 performance using the Probe Health sensor, sending you alerts when its interval delay or open requests go up to let you know you may need to distribute the load. This helps you ensure your SNMPv3 implementation is as performant as possible even as your network scales.
If you’re monitoring a small office network, a data center, or a global enterprise infrastructure spread out over multiple locations, PRTG’s extensive SNMP support combined with SNMPv3’s top-notch security ensures your network gets the visibility it needs and the protection it deserves.
Ready to experience secure, comprehensive network monitoring?
👉 Download your free PRTG trial now and try it risk-free. Monitoring with SNMPv3 has never been easier. All SNMP sensors are included in your free trial. SNMPv3 and automatic discovery of devices are supported.