 Published by Kimberley Parsons Trommler
Last updated on January 23, 2024
•
3 minute read
A huge thanks to Jorge de la Cruz for preparing a detailed guide on how to monitor a QNAP NAS using PRTG. This article is a short summary of the article he recently published on his new English-language blog jorgedelacruz.uk.
Getting Started
As Jorge describes in his article, the first steps are to:
- Enable SNMP on your QNAP NAS
- Create a QNAP NAS device in PRTG
- And then start adding sensors!
Monitoring QNAP with Built-in PRTG Sensors
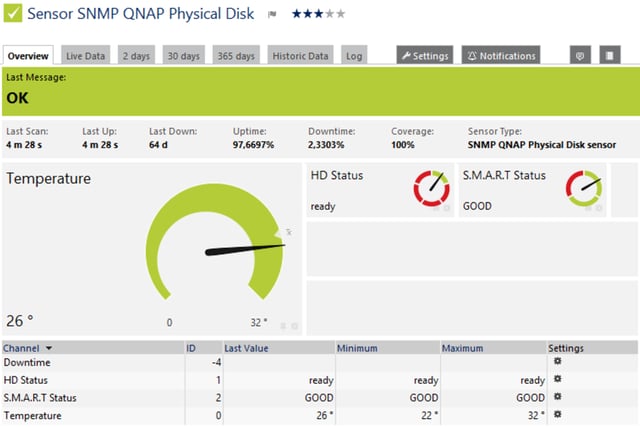
PRTG includes three pre-built QNAP sensors, based on SNMP, for monitoring:
For example, the QNAP Physical Disk Sensor includes the S.M.A.R.T. status of the disk:
But Don’t Stop There
However, the QNAP sensors listed above are not the only ones that are useful for a QNAP NAS. There are lots of other PRTG sensors you could add, such as:
- SNMP Traffic (to keep track of network traffic); or
- SNMP Disk Free (to keep track of disk space)
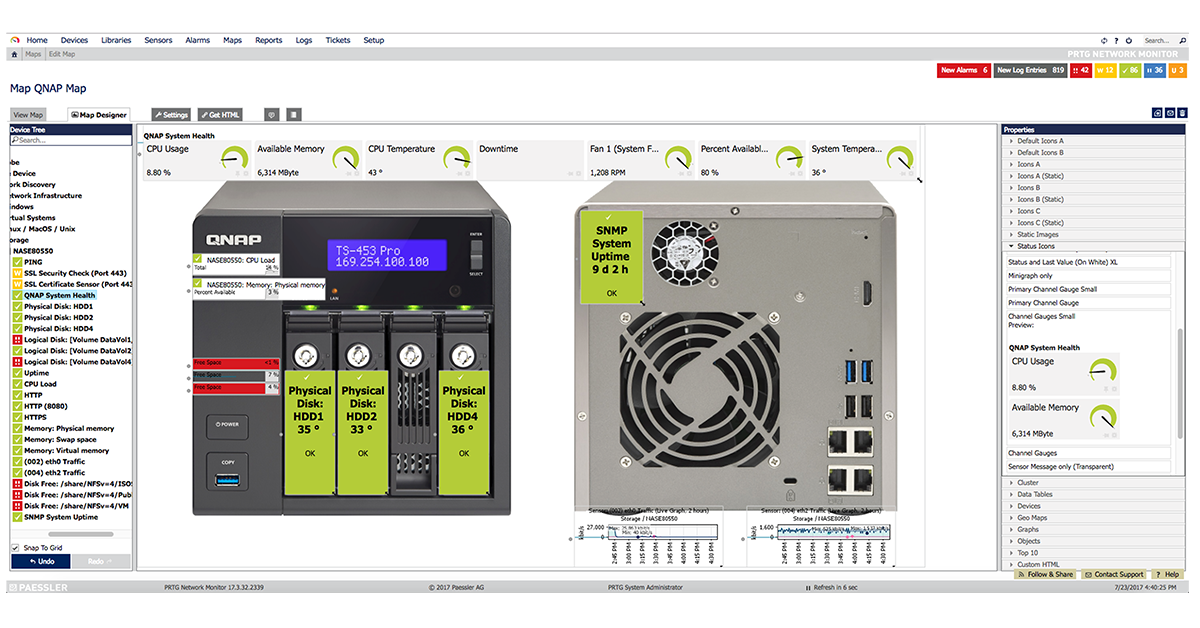
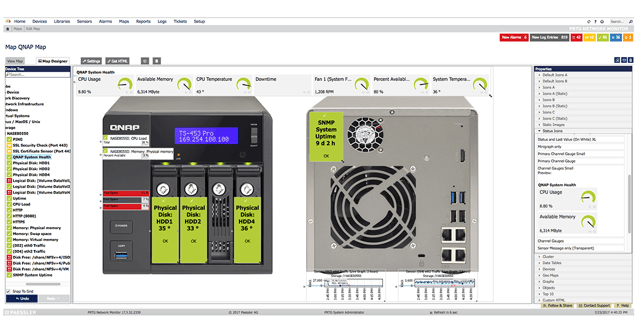
Once you've got all the sensors running, you can create a dashboard map to show the NAS status:
For more details about these sensors, the dashboard map, and more, please check out Jorge's full-length article here.