 Published by George Liu
Last updated on March 03, 2022
•
5 minute read
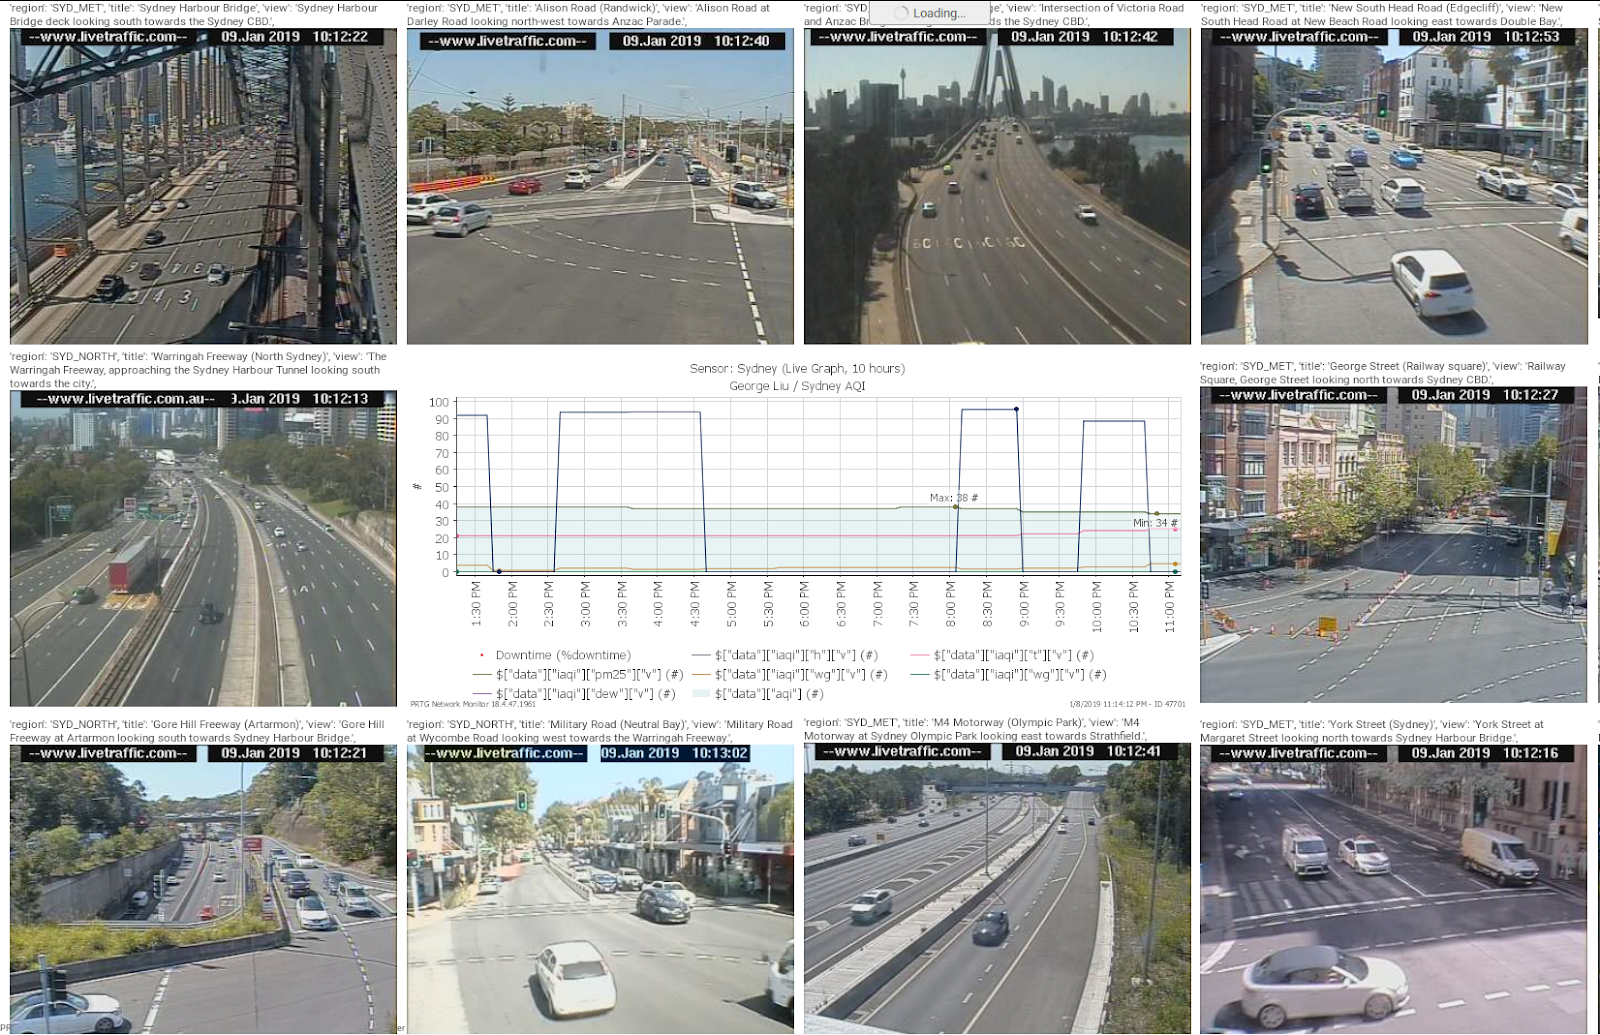
Hate being stuck in traffic? Ever thought about how network monitoring software can be used to ease that congestion? In this article, I will show you how to implement live traffic cameras into PRTG. So again, let’s get physical with PRTG.

First things first, let’s find the links which will allow us to add in the individual cameras.
(This particular example refers to traffic cameras located in Sydney Australia. Please find out if these facilities are available in your region.)
1 - Register for a NSW Open Data account:
https://opendata.transport.nsw.gov.au/
2 - Under ‘My Account’ select ‘Applications’
https://opendata.transport.nsw.gov.au/applications
3 - Create a new application and select ‘Live Traffic Cameras API’
4 - Once the new application is created, search for ‘Live Traffic cameras’
https://opendata.transport.nsw.gov.au/dataset/live-traffic-cameras
5 - Test newly created application against API to obtain image URL of cameras.
For example:
{
      "type": "Feature",
      "id": "d2e11",
      "geometry": {
        "type": "Point",
        "coordinates": [
          151.13159,
          -33.78199
        ]
      },
      "properties": {
        "region": "SYD_NORTH",
        "title": "M2 (Ryde)",
        "view": "M2 at the Lane Cove Road exit looking west towards Epping.",
        "direction": "W",
        "href": "http://www.rms.nsw.gov.au/trafficreports/cameras/camera_images/m2_ryde.jpg"
      }
    },
    {
      "type": "Feature",
      "id": "d2e5262",
      "geometry": {
        "type": "Point",
        "coordinates": [
          150.84489,
          -33.79519
        ]
      }
Once you have obtained camera_image URLs for all desired locations, it will be time to open PRTG and create the map to view these images.
There are great tutorials offered by my colleagues at Paessler to create basic maps, but the following instructions will be tailored to adding traffic cameras into PRTG maps.
|
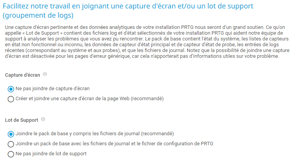
Step 1: Add Map Hover over (+) and select Add Map from the menu to add a map. An assistant appears. Enter a Map Name and define Map Layout settings (size and optionally a background image). In the Public Access section, define the accessibility to your map without login. |
 |
Step 2: Add Map Items
|
 |
|
Step 3: Identify item properties
|
 |
|
Step 4: Add HTML syntax to pull live camera information
|
 |
|
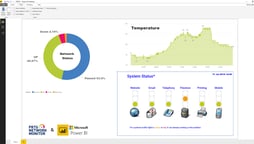
Step 5: Sample live camera |
 |
So that's it with Getting Physical With PRTG, Part 2. Have fun trying it out. If you have any questions, criticism or wishes, please feel free to send us your comments. And if you are interested in part 1 of this series, you can read it here.