 Published by George Liu
Last updated on March 03, 2022
•
6 minute read
Are you working in the IoT space and looking for the ideal platform to collect, visualise and report that data?

The term IoT - Internet of Things gets used a lot, but what does it actually mean? In a nut shell, the concept of IoT involves network connectivity with physical devices (Electronic home devices, Thermometers, Relays, Flame detection, etc) which would have worked in a previous life as standalone devices.
For example, with an IoT enabled AC unit, turning on the system would be as easy as unlocking your smartphone and clicking on the AC app. Rather than...dragging yourself out of bed in the middle of the night, stepping over lego pieces, reaching over rubbing and patting the wall to finally lay hands on a waiting cockroach...screaming and turning on the AC.
Let’s Get Started With LoRa
First, you need a LoRa development kit followed by a running instance of PRTG.
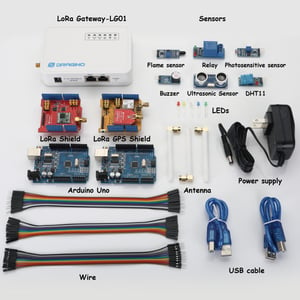
The Dragino manual will also come in handy.
Once the dev kit arrives and PRTG is installed, unbox and wire up the components as follows:
Setup - PRTG:
- Install PRTG
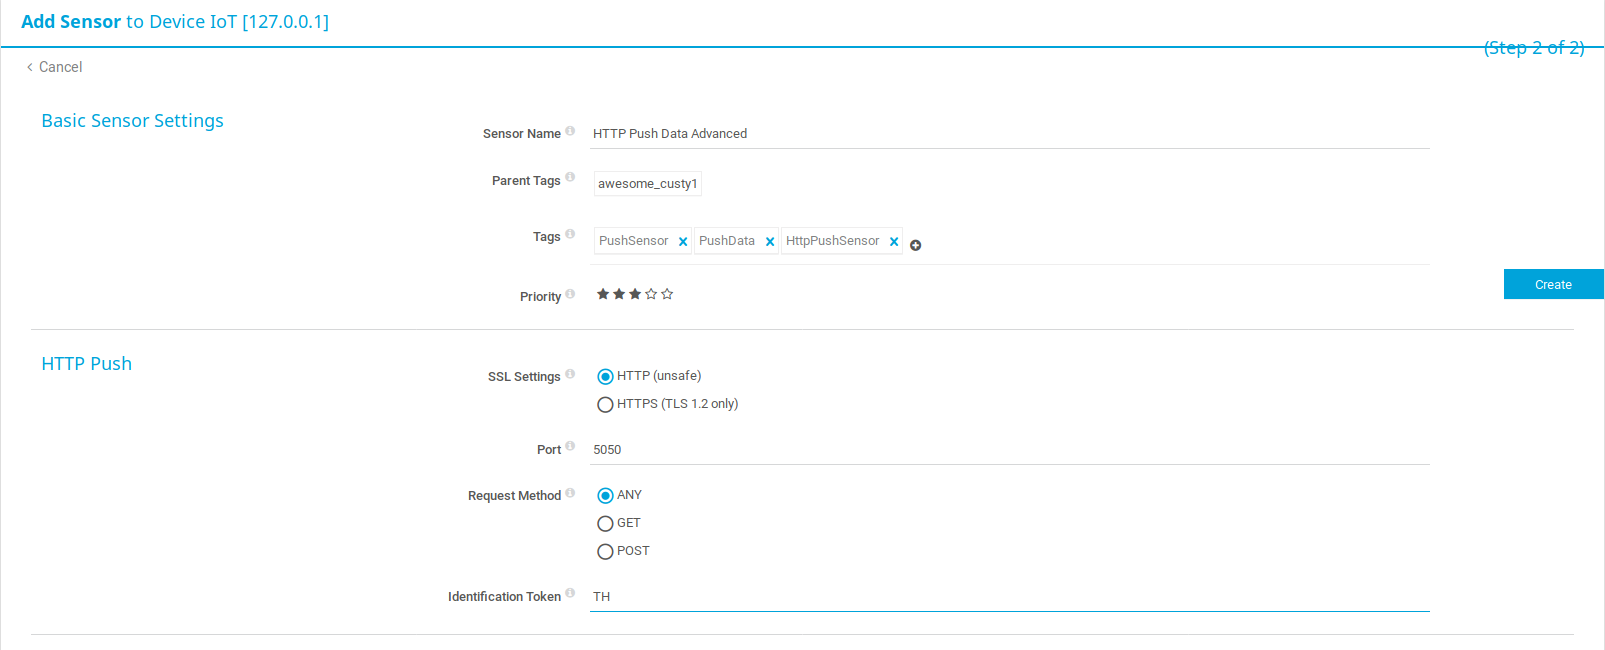
- Setup HTTP Push Data Advanced sensor
- (If haven't already) Create device in device tree: Right click on device tree and select ‘Add device’ - Input IP 127.0.0.1
- Add HTTP Push Data Advanced sensor:
Right click on newly added device and select ‘Add sensor’ > search for HTTP Push Data Advanced > Change the ‘Identification token’ - to any 3 character combination (this is due to the Arduino having only 2 Kbytes of SRAM. We will need all of it to concatenate our upload strings properly) > add sensor.
- Depending if you choose HTTP or HTTPS, the URL for your sensor should look something like this:
If HTTP: http(s)://<your-prtg-url:5050>/<your-3-character-id-token>?
If HTTPS: http(s)://<your-prtg-url:5051>/<your-3-character-id-token>?
Please note this down as you will need it before uploading the Arduino sketch for the LG01 gateway.
Setup - Arduino IDE:
- Install arduino IDE (Download available here)
Once installed, make sure to add dragino libraries and other specifics (Page 18 of Dragino manual)
Setup LoRa Gateway(LG01)
Make sure to connect Dragino WAN port to LAN port of your router with internet access.
Power up the gateway(LG01) and on first boot will generate an unsecure WiFi network called dragino2-xxxxxx.
Connect to the newly created WiFi network and your laptop will automatically be allocated an address in the range of 10.130.1.xxx The LG01 has a default IP 10.130.1.1 (It is recommended to also setup WiFi security).
Once connected lets upload the custom arduino sketch to make the LG01 communicate with the LoRa node and send data directly to PRTG.
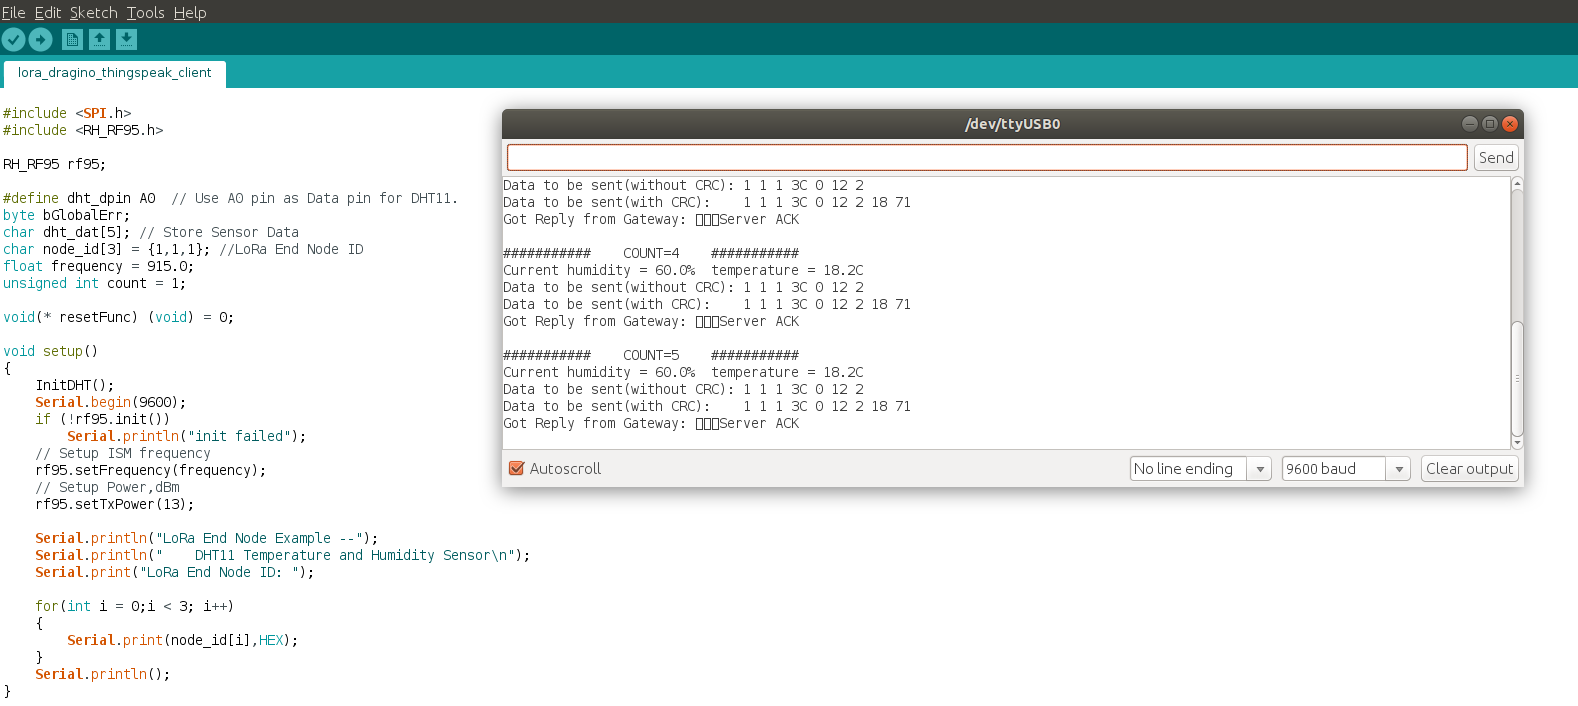
Upload Arduino Sketches To Both LoRa Node And LG01
Use the following custom scripts and Link to custom arduino PRTG scripts
- Gateway(LG01) sketch: This Arduino sketch needs to be modified to point to the newly created ‘HTTP Push Data Advanced’ in PRTG. To do this, download the Gateway(LG01) sketch, open in notepad and search for line 167:
- (String upload_url = "http://127.0.0.1:5050/TH";) and change this to what you noted down after creating the ‘HTTP Push Data Advanced sensor’ in PRTG (Earlier step).
- Save and upload the sketch to your LG01 gateway. Make sure to select the correct ‘Board - Dragino Yun + UNO or LG01...’ and ‘Port - dragino-xxxx’ in the Arduino IDE.
- No modification needs to be made to the Client(LoRa node). Simply download and upload sketch to Arduino.
(Start from page 17 of Dragino manual)
Test connection between LoRa node and gateway.
Check For Connectivity Between node <> gateway <> prtg
- Via Arduino IDE
Tools > Serial monitor
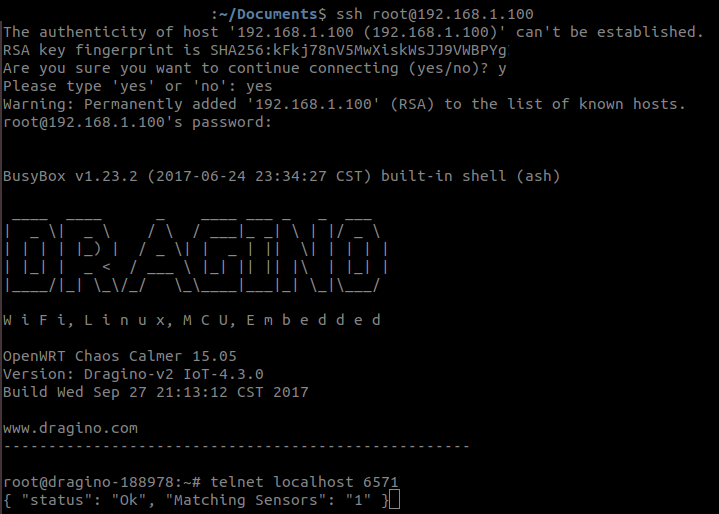
- Via SSH
SSH into LG01 gateway and run the command. Telnet localhost 6571.
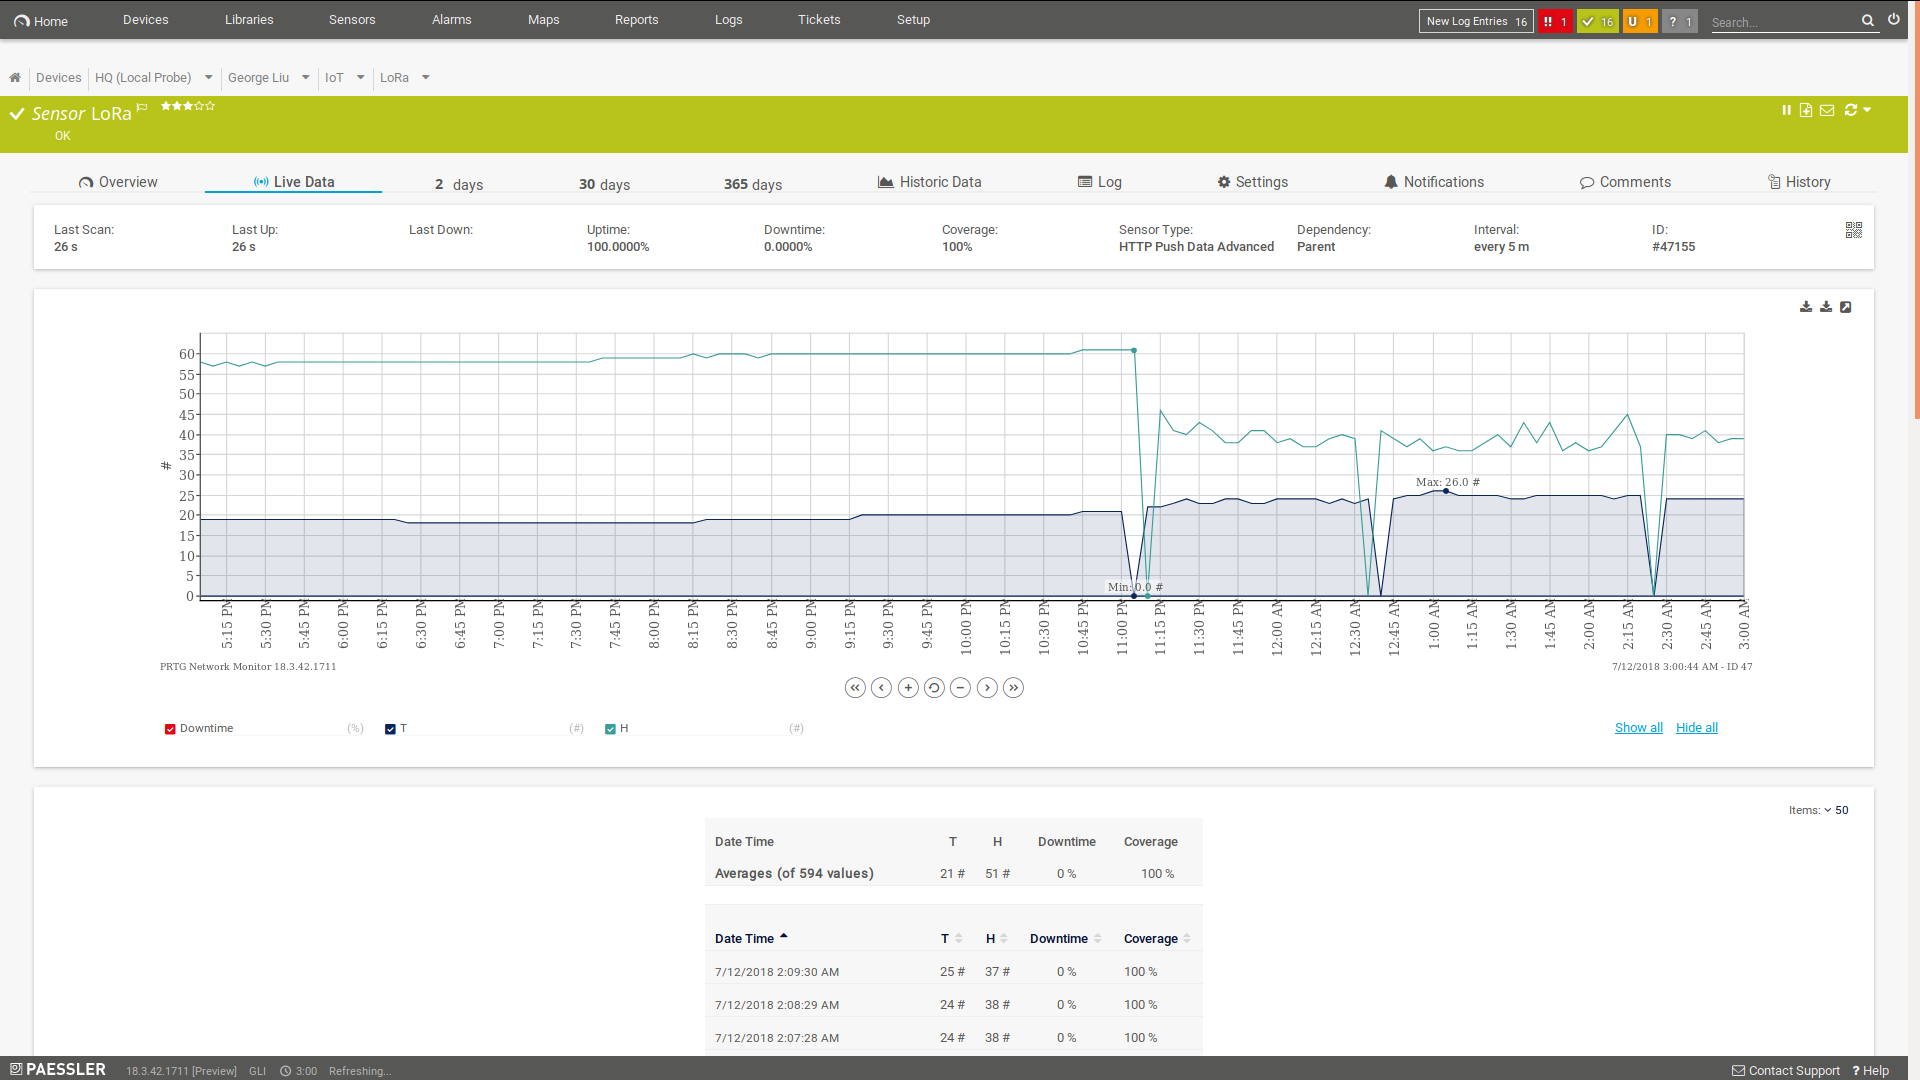
Once the data starts arriving in PRTG, you can setup threshold alerting, visualise the data with other PRTG sensor data, report on that data and also trigger actions on other devices such as changing the AC temperature, turning on recording for a camera etc.