 Published by Bjoern Pohl
Last updated on March 03, 2022
•
14 minute read
Here's how you get all those cool admin and dev tools like WSL, Chocolatey or OpenSSH running on your Windows 10 machine. Below (after a short introduction) is a hands-on guide of how to customize your Windows 10 settings to make you feel comfortable as a sysadmin or developer, with all the tools you need.

The Two Characteristic Developer Groups
On the one hand we have the typical Windows-based sysadmin or developer. They typically like a colorful working environment and can't imagine life without a mouse or touch pad. In Germany we also call this "klicki-bunti". 😊
On the other hand, there is the software-developing Mac lover. They feel comfortable on the console and do most of their work with the keyboard.
Theoretically, there is of course also a third category of the Unix/Linux supporters. But this article is not about them today (sorry folks, I hope you'll continue reading anyway) 😉
Software Development Is More Fun in a Mac Environment – So Far!
Microsoft didn't exactly provide an ideal working environment for developers with the previous Windows versions. That was one of the reasons why many developers switched to Apple over the years and now develop their software on the MacBook.
Meanwhile Microsoft has recognized this and is trying with the current versions of Windows 10 to get this user group back to Redmond from Cupertino.
Honestly, Windows 10 is not an out-of-the-box development environment either, at least not from the perspective of a Mac user (and certainly not a C#/PowerShell user). But in the meantime, this can be modified. And that's exactly what we're looking at today!
When you are done with this article, then you'll be able to equip your Windows 10 environment with features like:
- A Package Manager
- Windows Subsystem for Linux
- Synchronized home folders between Windows and Linux distribution
- A shiny, colorized terminal for bash
- An OpenSSH Authentication Agent
- Bridged SSH sockets between Windows and WSL
So get a big cup of coffee and read on! And as always - read first, then tweak according to your needs and wants! ;)
iPlease Note: The settings I suggest in this article are subjective and correspond to my personal favorite working environment. If you have any questions, please use the comment function and I will answer your questions as best I can. But as the solutions described in this post are not part of PRTG itself, they are not officially supported by Paessler or PRTG Technical Support.
Prerequisites, or What You Need
- A device with Windows 10 Release 1803 or higher (older versions might partially work)
- Admin access to your Windows installation
- Basic Windows knowledge: how to start a command shell, PowerShell, find the settings box, and so on
- Basic knowledge of how to install things
- About 1 hour of time. You'll get that hour back within 3 days, believe me!
Turn On Some Windows Features
At first we need to enable some needed Windows features that are turned off for the default folks. Make sure the following Windows features are checked:
- Telnet Client (still a good debug tool)
- Containers (yep, that’s Docker! But it's only the Docker engine - we'll still need to install some Docker stuff later on to make it work)
You can also run the cmdlets below in an elevated PowerShell (elevated = a PowerShell you launch with administrative privileges) to add the features.
Enable-WindowsOptionalFeature -Online -FeatureName "TelnetClient"
Enable-WindowsOptionalFeature -Online -FeatureName "Containers"
Windows might ask you to reboot. Either do that now or wait until you have finished the next step.
Grab Some Chocolatey – a Package Manager for Windows
Mac users probably know Homebrew, the package manager for macOS, and Linux users have apt/yum.
Be careful if you have laughed at the Windows folks because of the missing package manager, because this is now also available in Windows 😉. The Windows counterpart is called NuGet, but more commonly people use Chocolatey. Installing Chocolatey is quite easy; find some instructions (and the install string) at chocolatey.org/install.
Install the Git Package via Chocolatey
To pull Git repositories from Github later, install the Git package in the next step. Just execute this command in an elevated PowerShell:
choco install git
That's it! Pretty easy, huh?
WSL – a Native Linux Shell Running on Windows
WSL (Windows Subsystem for Linux) is a kind of Linux system running inside Windows.
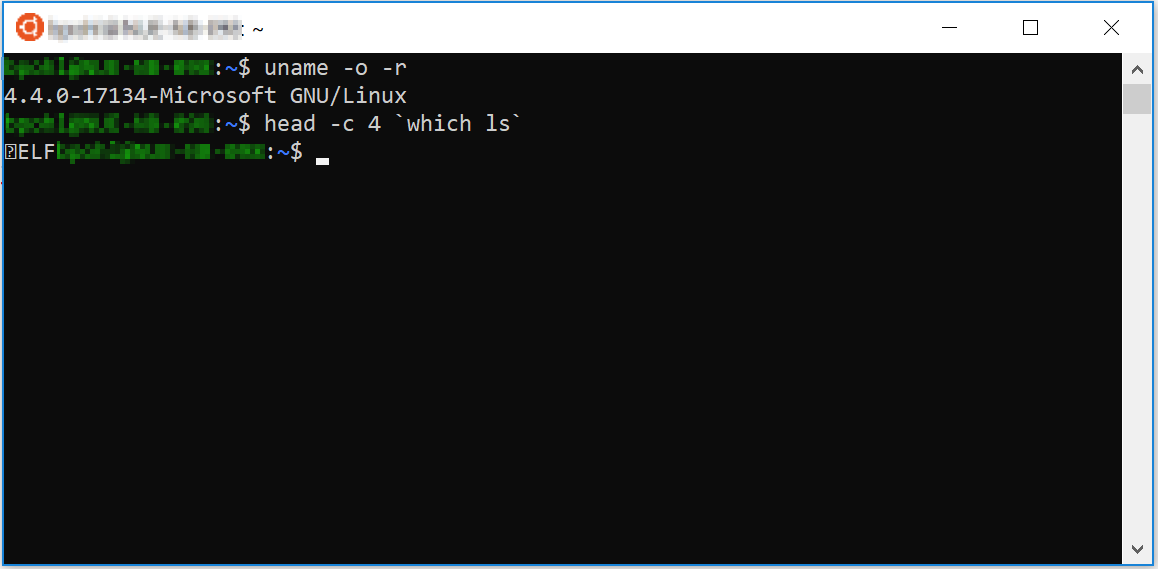
WSL is not a VM or a processor emulation like qemu. Actually, Linux kernel calls are translated (using a special wrapper kernel) to Windows NT Kernel calls. Unlike cygwin, you'll start native Linux/Elf binaries instead of re-compiled Linux stuff. So, you don't need HyperV or VMware running on your Box, at least not for WSL.
Why Should You Use WSL?
For those coming from a Mac the answer is quite clear. You get a full-fledged Bash Terminal and you can use all the tools you are comfortable with.
For Linux Users it's quite the same.
People regularly using PowerShell will have the least benefit, since Windows now also comes with SSH, curl and all the basics (and Chocolatey makes it easy to complete the list).
What Can the WSL Not Do?
Running X (graphical) applications isn't possible (at least not without doing some very crazy moves). It's also not suited for running complex software (tomcat, apache, nginx, younameit). Don't even think about it - the kernel call wrapper makes it super slow.
WSL Installation
The installation process is straightforward: just use the official Microsoft Doc Windows Subsystem for Linux Installation Guide for Windows 10. You can launch your installed Linux environment by choosing it from the start menu.
iPlease Note: WSL is quite new, so make sure you use at least Windows 10 Release 1803 (or better, Release 1809) to have a smooth experience.
Ubuntu 18.04 is a good choice as a Linux operating system. Again, don't think of a full VM with a login manager, desktop manager and so on. Rather, this package just contains all the binaries in exactly the same versions as in Ubuntu 18.04, and the 18.04 apt repository is used.
Easy Data Transfer between Windows and WSL
Sometimes you need to shift data between Windows and WSL. WSL has all windows drives available in the folder /mnt/ but this is quite fiddly.
Better idea:
- open a cmd windows shell
- mkdir %HOMEPATH%\winbin
- mkdir %HOMEPATH%\share
Then switch back to WSL and execute
cd;ln -s /mnt/c/Users/<your windows username here>/winbin
cd;ln -s /mnt/c/Users/<your windows username here again>/share
This creates a symlink link between the Windows home folder and the Linux home folder. Now you have two convenient directories to share content in Windows' home and WSL's home. Why that winbin dir? We'll see later.

A Smooth Look and Feel In WSL
In newer Windows versions, it's possible to configure WSL's behaviour with a small config file. We'll need that to make upcoming things work. It needs to be placed in /etc/wsl.conf, which is absent by default.
To simplify the configuration for you, I have prepared a HereDoc. Just paste the content below into the WSL window and press Enter.
sudo bash -c "cat >/etc/wsl.conf" <<"EOF"
#Lets enable extra metadata options by default
[automount]
enabled = true

# add metadata to WSLs shared filesystem and set an umask. unfortunatly theres a bug so we need to set
# the umask again in .basrc or so...
options = "metadata,umask=22,fmask=11"
#next line allows us to add smb/cifs/nfs.. shares in /etc/fstab and have them mounted at wsl start.
mountFsTab = true

#Let's enable DNS even though these are turned on by default, we'll specify here just to be explicit.
[network]
generateHosts = true
generateResolvConf = true
EOF
It creates your wsl.conf, inserts all the config information and saves the file with the needed permissions.
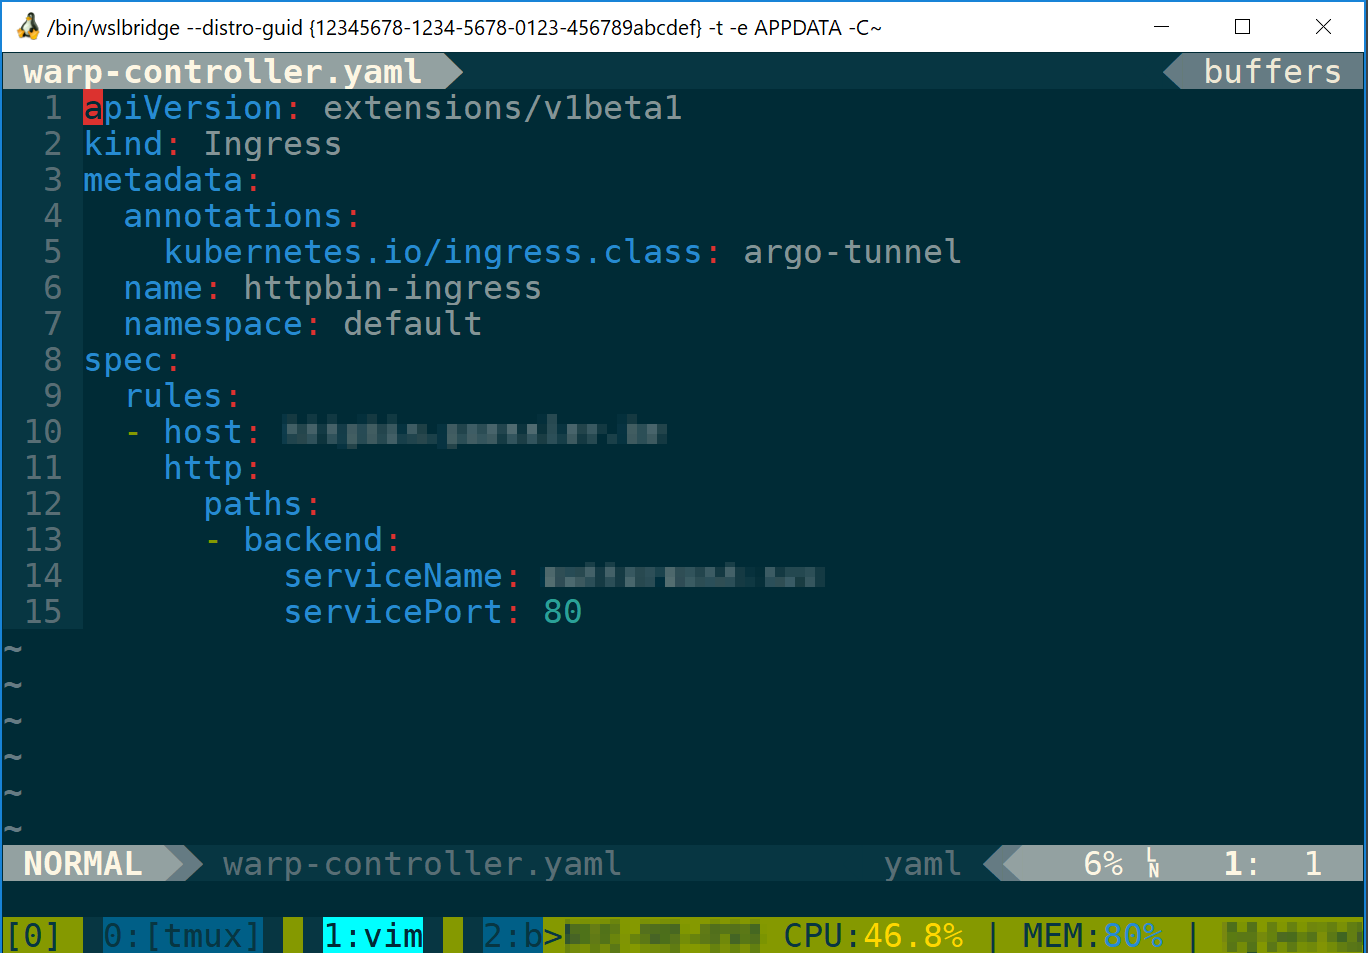
A Customized Terminal for Bash in WSL
The terminal that comes with WSL is goofy and cannot be customized to our needs. Let's change that. There is a special mintty fork that bridges mintty into the WSL console interface called WSLtty. Windows installers can be found here.
After the installation you will find the WSLtty in your start menu with the name "WSL Terminal". Now it all looks waaaaaay better! 😊
Most important keyboard shortcut: Alt+Enter switches to full screen.
Don't worry if the picture above looks different than yours. There are more features to come.
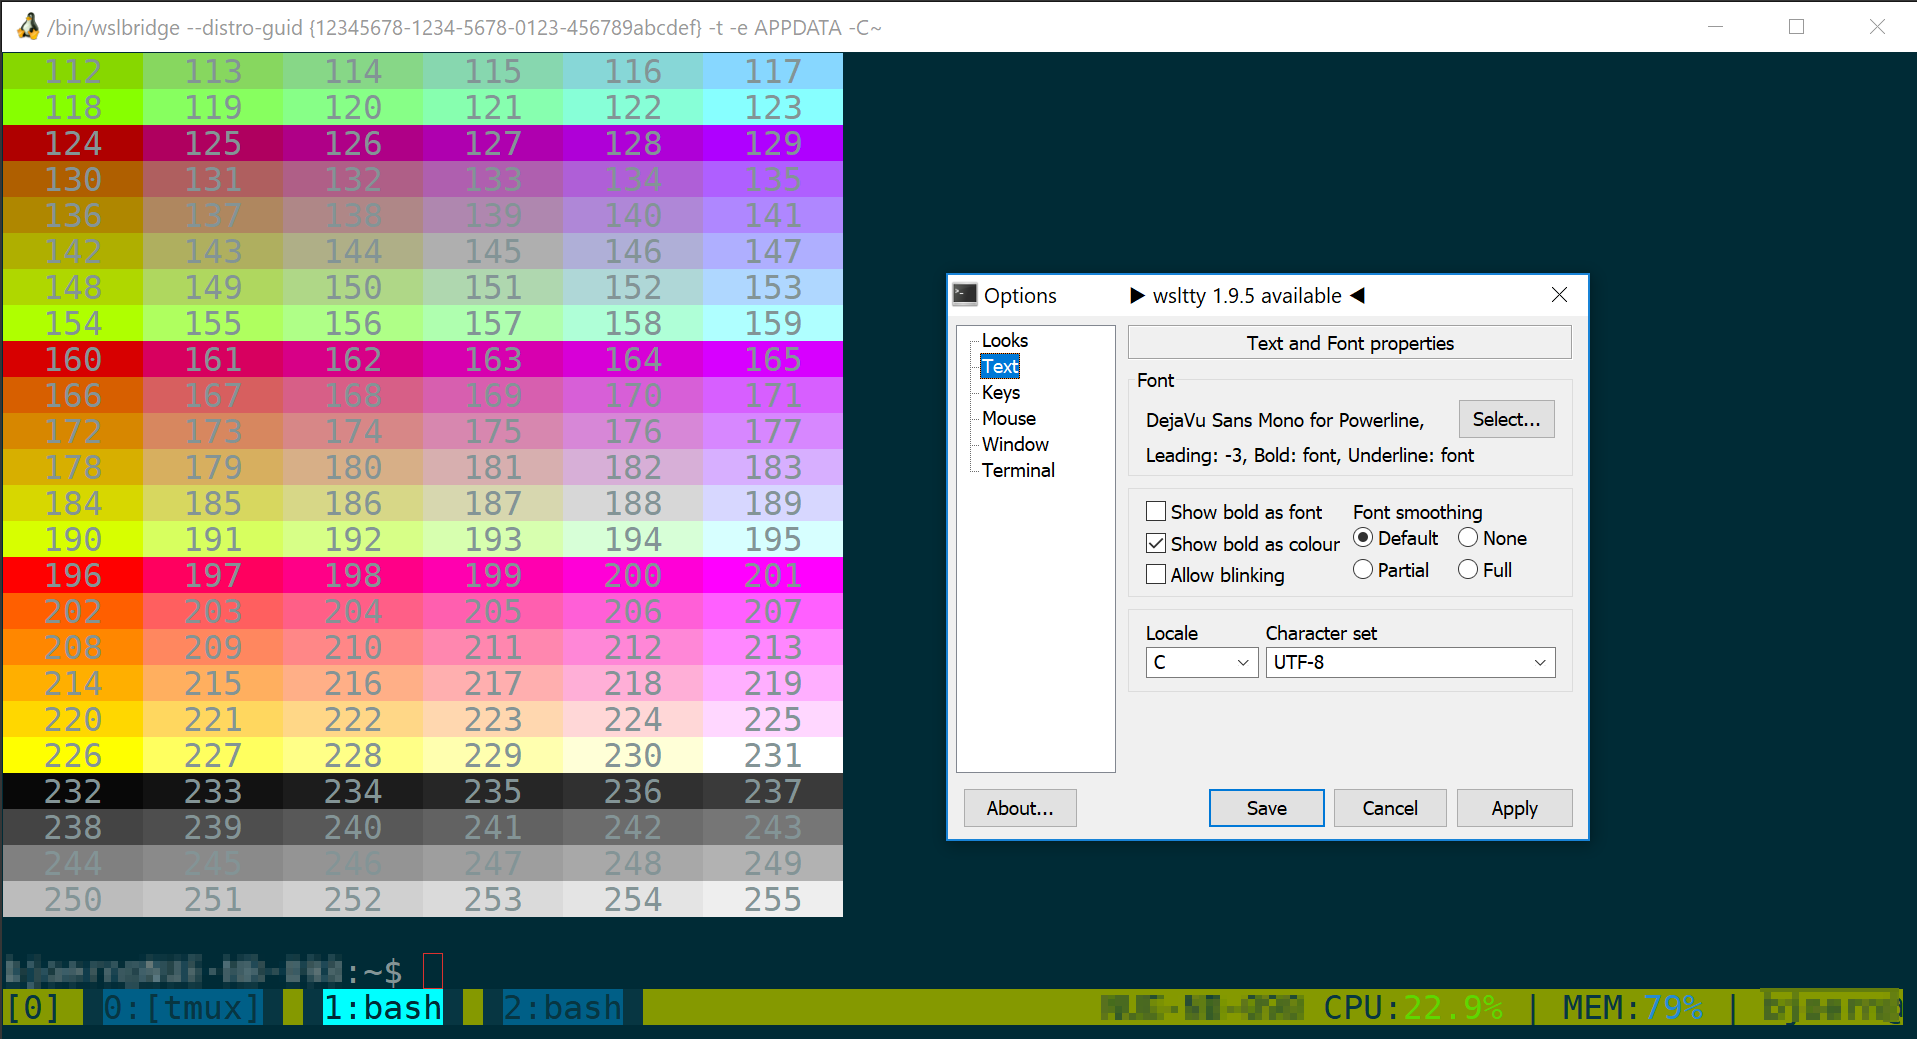
Fancy Fonts for the Console
Have you ever seen really useful console fonts in Windows? Me neither. This is why we need to have patched fonts to get cool graphical console features like this:
Clone this repository and execute install.ps1 inside that repo using an elevated PowerShell. Here are the needed commands:
cd $env:userprofile
git clone https://github.com/powerline/fonts console-fonts
cd console-fonts
Set-ExecutionPolicy Bypass -Scope Process -Force; .\install.ps1
This will install a bunch of patched console fonts into Windows, enough for every nerd's need. This takes some time, so relax and maybe get another cup of coffee.
You can now use one of these fonts for the editor of your choice. We will also set one of these fonts as default in our WSLtty in the course of this hands-on. The font DejaVu Sans Mono for Powerline is my personal favorite, by the way.
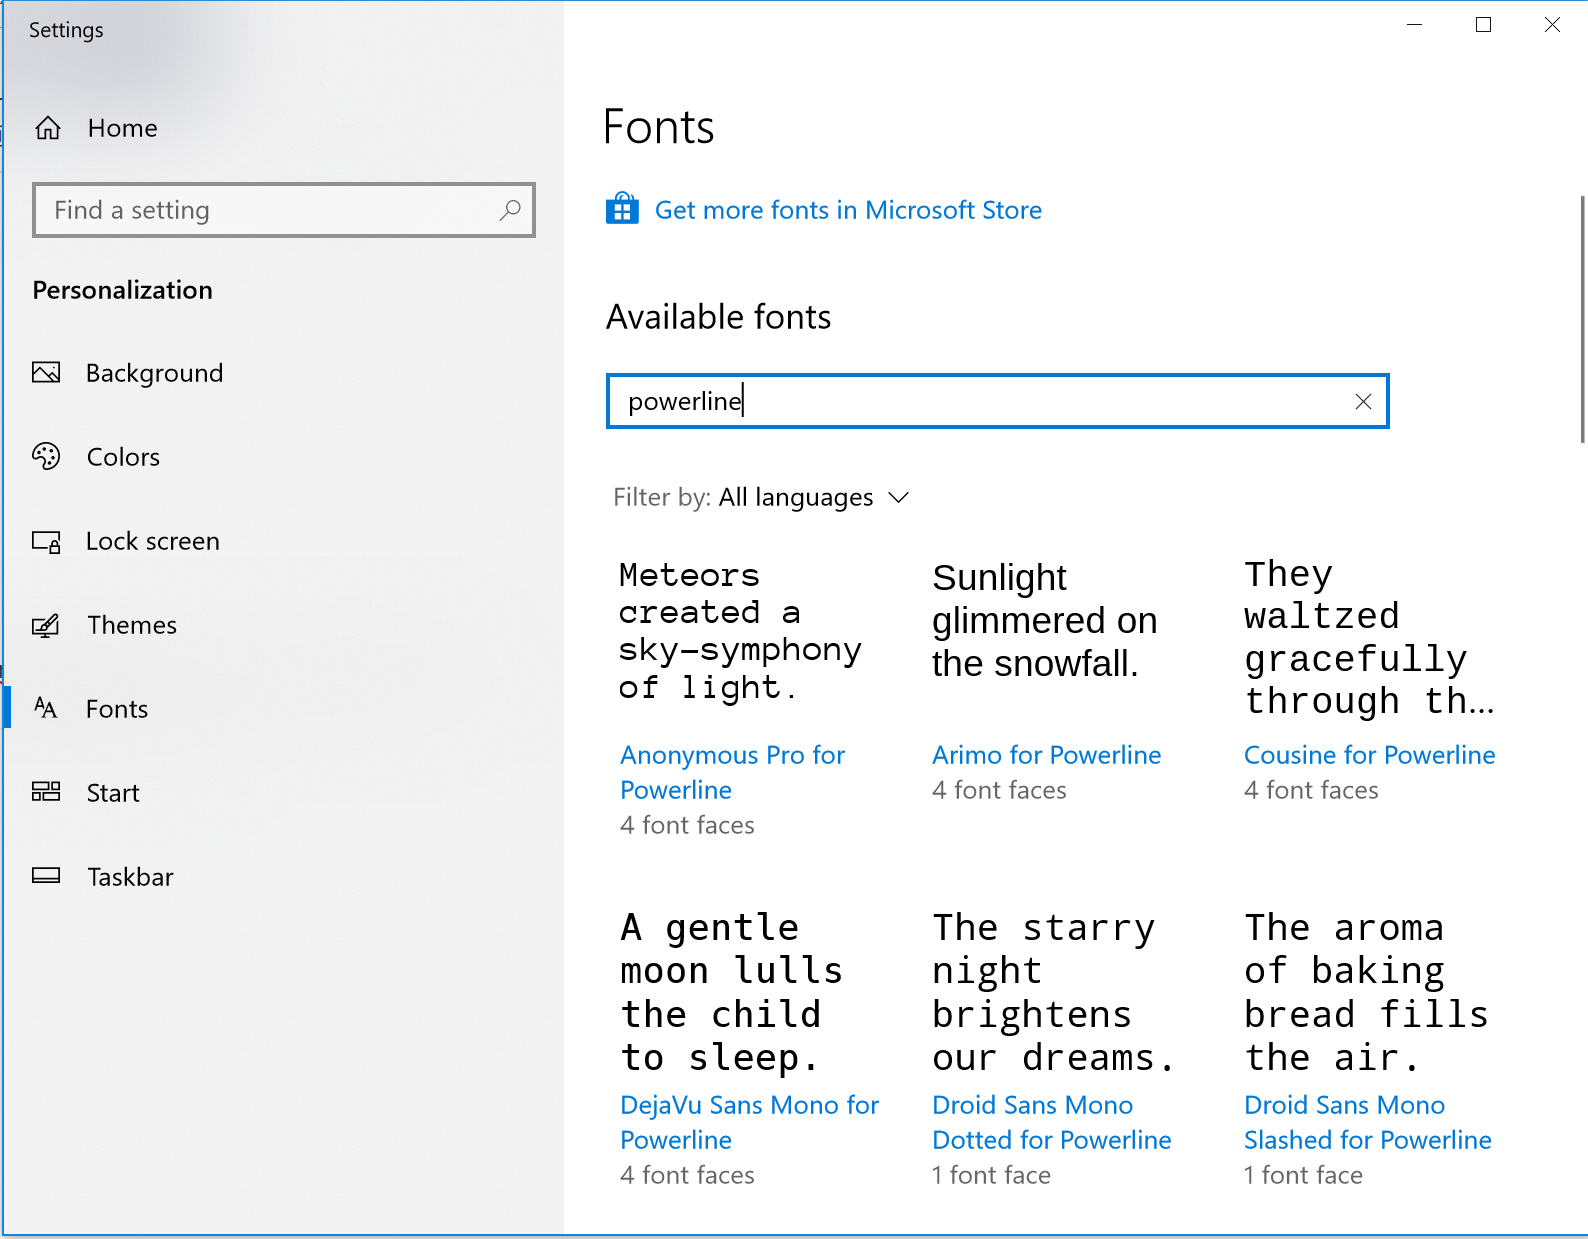
You can check all installed fonts in Windows' settings dialog. Enter "powerline" as a search term to find all the new fonts:
Finally, a Precision Color Scheme for WSLtty
Before we start, let's look at our WSL/minty shell. Well, it’s dark blue text on black background; not so great. We need to change this to something better.
I personally prefer a color scheme called "Solarized Dark", but there are countless others available.
To get the Solarized color scheme in WSLtty, we need to tweak WSLtty's config a bit. This can't be done using WSLttys settings box, as it only shows some basic color types.
To make this easy for you, I prepared a small HereDoc once again, this time for use in PowerShell instead of bash. So open a non-elevated PowerShell and paste this:
$content = @"
# To use common configuration in %APPDATA%\mintty, simply remove this file
ForegroundColour=131,148,150
BackgroundColour=0,43,54
CursorColour=220,50,47
Windows=max
Black=7,54,66
BoldBlack=0,43,54
Red=220,50,47
BoldRed=203,75,22
Green=133,153,0
BoldGreen=88,110,117
Yellow=181,137,0
BoldYellow=101,123,131
Blue=38,139,210
BoldBlue=131,148,150
Magenta=211,54,130
BoldMagenta=108,113,196
Cyan=42,161,152
BoldCyan=147,161,161
White=238,232,213
BoldWhite=253,246,227
Font=DejaVu Sans Mono for Powerline
FontHeight=14
Transparency=off
OpaqueWhenFocused=no
Scrollbar=none
CursorType=block
Term=xterm-256color
"@
$content |Out-File $env:APPDATA\wsltty\config -Encoding ASCII
Press enter and restart your WSLtty. Et voilà, there we are!
This actually overwrites your WSLtty config to my preferred config.
Did you already make changes there before (or in the properties dialog of WSLtty..)? Hmm...they're gone.
If you are tired of Solarized, have a look at Base16. Find some MIN/WSLtty templates for Base16 (amongst others) here.
OpenSSH – an Authentication Agent for Windows
The OpenSSH client is an optional Feature in Windows 10, so you have to perform the following steps:
- Go to Settings > Apps > Apps & Features > Manage Optional Features
- Click "Add Feature", check "OpenSSH client"
This adds an OpenSSH client. We need that, even if we only use WSL later on for SSH connections, because this gives us a cool authentication agent that can also be used within WSL.
To enable this agent, make sure that the OpenSSH Authentication agent is started in Windows Services. It's turned off by default. Change the startup type to ‘Automatic’ and start the service.
Again, you can perform the described steps by using the cmdlets below. Execute them in an elevated PowerShell.
Add-WindowsCapability -Online -Name OpenSSH.Client~~~~0.0.1.0
Set-Service ssh-agent -StartupType Automatic
Start-Service ssh-agent
iPlease Note: Updating Windows to Win10 Release 1809 triggers a bug which unfortunately disables the service. If you get errors after this update that SSH won’t communicate with the authentication agent, just go to Windows services and re-enable (and start) OpenSSH Authentication Agent.
Now that we have OpenSSH running in Windows, let's recap:
- In a modern Linux/macOS environment, you usually use the provided SSH agent that locks/unlocks with your operating system
- Now, there's an OpenSSH suite inside Windows, which has such a cool OpenSSH agent that also automatically stores your keys and locks/unlocks your key with your OS login.
- And on the other side there's OpenSSH inside WSL (or in other words: the stuff that came with Ubuntu), which also comes with an OpenSSH agent.
BUT: The agent inside WSL is way more uncool since this has to be started, unlocked and managed by hand. No chance to get the Kerberos ticket from Windows into that thingy. ☹ And by the way - WSL does not have any startup system like SystemV or SystemD, so you'll always get beamed into bash, perhaps with some additional processes started in your .bashrc and things like that...
Let the Magic Happen: Bridge the SSH Socket from Windows to WSL
To use a self locking/unlocking agent inside WSL, we need some way to bridge the socket of the Windows' SSH agent into WSL.
Download the SSH agent for WSL here and unpack the .7z file into your ~\winbin folder. Remember, you created this folder earlier in this article, in your home directory.
This actually installs a "fake" SSH agent inside WSL, which then bridges all calls to the Windows SSH agent.
Now call this Windows executable inside the .bashrc of your WSL, which is located in /home/yourusername/.bashrc by default. Use the eval call as in the install section above to do so. (Yeah, right, a Windows binary inside Linux's .bashrc).
And here's the command you need to execute:
#start ssh-agent bridge: https://github.com/rupor-github/ssh-agent-wsl
eval $(./winbin/ssh-agent-wsl -r)
Now you can add your desired keys with ssh-add (or ssh-add.exe) . It's up to you if you do that in PowerShell/cmd or WSL, because both ways make it available to both worlds, permanently! Great! 😊
Coming Up in Part 2: Docker, TMUX and More…
Since this should be more than enough information at once, I decided to provide you with a second part of this hands-on guide. Next time I’ll show you how to activate and use Docker within WSL and give you some insights about TMUX, a terminal multiplexer for Unix-like operating systems.
As always, use the comment box below to post your feedback!